Celeriac Chips – Who Needs Potato? The Low Carb Food Revolution Continues!

Celeriac Chips

In a contest between low carb v bloating starch & sugar; the ketogenic approach seems to be boasting “anything you can do, I can do better!” And that’s certainly the case with this recipe – celeriac chips!

When you first start a low carb or paleo regime, a lot of old favourites suddenly feel out of bounds. Without a little learning, any attempts to recreate them can often seem half-hearted, presenting a poor substitute for the dish you’re trying to copy.

With a little experience however, the food world is your oyster. And one thing I’ve genuinely missed…? Chips! Not that we ate them much anyway, but it’s always been more the feeling of depriving yourself that’s hard – the sense of ‘I can’t have this’ which makes you want it all the more!

Well celeriac chips are in no way a poor relative of their potato cousins. In all honesty, they taste far better and have a warm nutty flavour which is truly irresistible! And at circa 5g net carbs per 100g, they’ll hardly break the carb bank, leaving ketogenic dieters, paleo fans and both types of diabetics free to tuck in with gusto!

So without further ado, the next life-changing low-carb experience awaits. And it couldn’t be easier!

Heat sunflower or vegetable oil in a frier or on the hob until circa 130°c. Whilst the oil is heating, peel your celeriac root with a sturdy peeler, then cut the ball in half vertically. Follow this by cutting each half into 1cm thick slices, then cut each slice in turn into 1cm wide batons.

Once the chips are cut, lower them into the hot oil and leave to cheerily bubble for 8-10 minutes until cooked through, but not brown. When I say cooked through, image ‘bite-able’!

When ready, lift the chips out of the oil and place on greaseproof paper or kitchen towel. Now turn up the temperature of the oil to circa 180-190°c ergo good and hot! Once the oil has reached the desired temperature, lower the chips back in and fry for a further 5 minutes until they’re golden brown with a slight crisp around the edges.

Lift out and place back onto kitchen towel again to drain for a couple of minutes. Dredge with a generous sprinkle of sea-salt and serve up to the ravenous horde. I’ll wager you try at least one before they reach the table!

A good low carb dip or sauce is garlic mayonnaise (aioli). What more can you want? So forget the humble potato – there’s far finer things on the horizon. When it comes to low carb, the grass is certainly greener. But don’t just take my word for it, try this recipe and give it a go yourself. You won’t regret it!

Thanks for reading and bon ap!

Adam.

Herby Cod Mornay with Fresh Garden Sorrel – Low Carb Cooking at its Best!

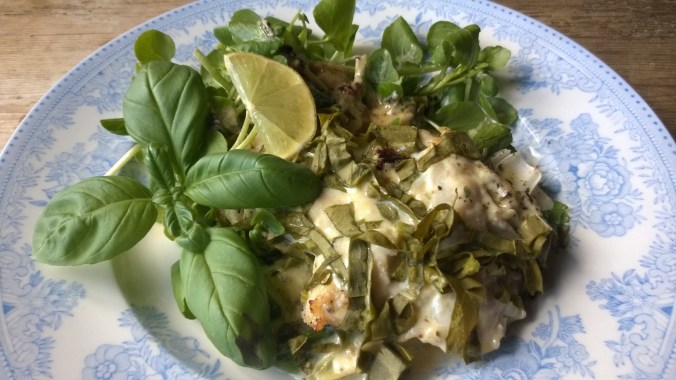
cod mornay sorrel

As Summer fades into Autumn, we seem to sit on the fence when it comes to food.

The heart and stomach are divided – half yearns for the substantial filling fare of October’s darkening nights; whilst the other half seems to mourn the carefree, light & delicate taste of Summer, as it slowly slips away for another year without a trace.

The kitchen garden seems to feel the same way. It clings on desperately to the last vestiges of warmth and sunlight, fighting to retain the fruits of its harvest until the last possible moment.

One such taste of Summer is sorrel. This wonderful leafy herb has a sharp, lemony taste, which reminds me in crispness of a sour green apple. It could never be accused of robustness and tends to wilt soon after picking.

Thankfully the greenhouse has coddled what’s left of mine; sufficient to serve up one last elegy to Spring. So let’s drink to that whilst we can!

The delicate tang of this fragile flavour responds well to richness. It serves as a counterpoint to deeper taste-profiles; lifting them and lightening the mood, like a laugh in the library.

In this instance, I’ve paired it with the luxuriousness of cream cheese and parmesan – all superb low carb ingredients, which makes this a great dish to serve up to diabetics, ketogenic-dieters or those following a paleo regime.

Serve it as a light lunch, starter or main meal bulked up with broccoli or cauliflower. If you can’t get hold of sorrel, fresh spinach and a good squeeze of lemon juice will do the job admirably. We aim for flexibility in the Low Carb Kitchen! So give this a try and let me know how you get on.

This dish couldn’t be easier to prepare. Allocate one third of a 200g tub of full fat cream cheese per portion.

Place your cod pieces (no pun) onto a baking tray and drizzle with olive oil. Season well and place into a hot oven for circa 15 minutes until the fish is cooked through.

Meanwhile, spoon your cream cheese into a heavy-based saucepan. Place this on a low heat and pour in a dash of double cream and a tablespoonful of water per portion. Season and stir well until all the ingredients are combined.

At this point sprinkle in a generous handful of grated parmesan cheese, squeeze in some lemon juice and add half your roughly chopped sorrel (at least a cupful).

Bring the sauce to a light simmer, then once the fish is ready, plate it up and spoon the sauce all over the top, erring naturally on the generous! Think ‘lashings’…

Finish will a flourish of the remaining chopped sorrel and some shavings of parmesan to garnish. One last touch of lemon or lime juice will cement the lightness of Summer, then simply tuck in and enjoy!

Low carb cooking doesn’t get better than this!

Thanks for reading and bon ap!

Adam.

Cavolo Nero – The Dark Highwayman of the Vegetable Beds! Deliciously Different Low Carb Sides

cavolo

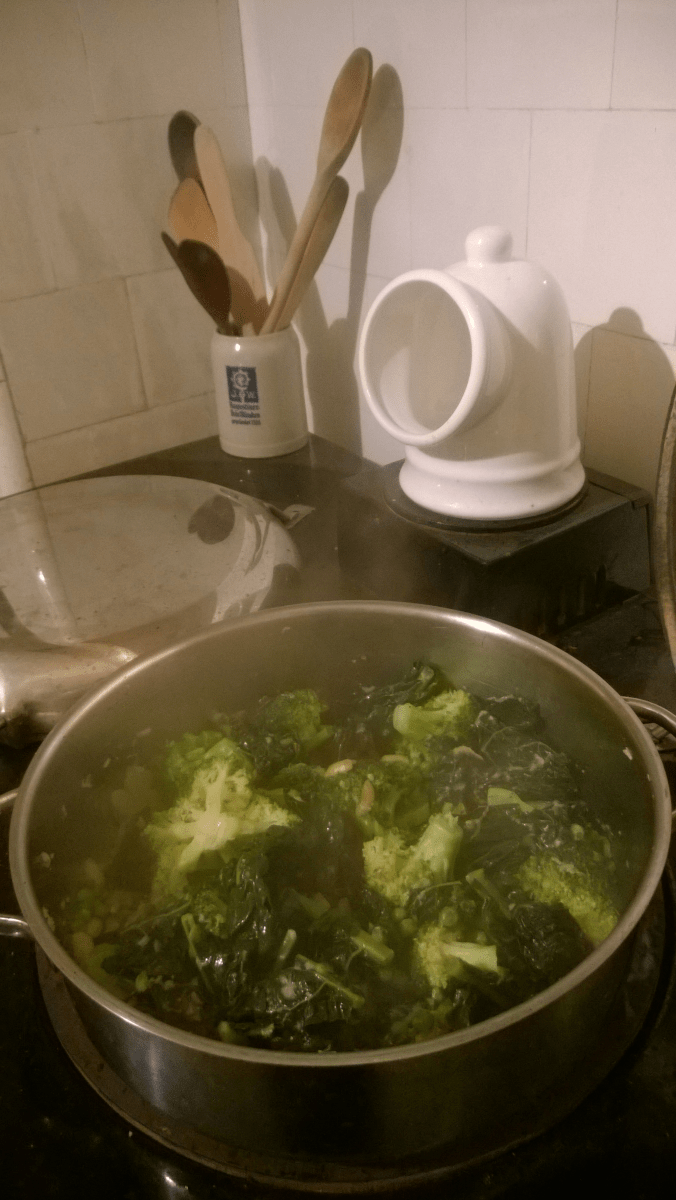
As Autumn slowly creeps in, we start to welcome back old friends to the kitchen and garden. One such returning hero, is Cavolo Nero; the dark highwayman of the vegetable beds!

Mysterious and enigmatic, the inky black leaves of this striking plant grow in strident clumps, rather than forming a cohesive ‘head’ like cabbage or other leafy greens. This lends it an almost cavalier ‘gothic’ appearance, which is as much of a pleasure to gardener as it is to low-carb diner alike!

But above and beyond its rather edgy & peculiar looks; this rugged Tuscan cousin of kale is absolutely delicious! And variety of side orders is particularly welcome on a low carb / ketogenic diet, where the risk of ‘vegetable monotony & repetition’ lurks around every corner!

Use it on its own, in stews, baked, sautéed, fried, steamed or with roasted vegetables. Its astounding utility is equally as striking as its good looks! And like all ingredients on this blog, Cavolo Nero is particularly low in carbohydrate (just 1.8g net carbs per 100g); so it’s perfect for ketogenic diets, diabetics or those following a paleo-plan. I’ve even heard it described as a super food; and if I’m honest, in this instance I can’t really disagree!

To cook this rugged brute, start by trimming off the tough white stalk at the base of the leaf. I tend to cut a ‘v’ into the stem, preserving as much of the green leaf as possible. Then simply chop the leaves into inch lengths, give them a good rinse in cold water, then strain into a sieve or colander.

Whilst the Cavolo Nero is draining, thinly slice an onion and soften on the hob in a generous spoonful of butter until it turns translucent. As the onion softens, chop your broccoli into chunks and add to the pan, stalk first as this is the longest part to cook.

Once the broccoli is in, add a couple of cloves of chopped garlic and crumble over a chicken stock cube or two. You could also use a cupful of fresh chicken stock if you’re glamorous enough to have this to hand.

Season the mix well, then pile in your Cavolo Nero and follow it with a god handful of frozen petits pois (overpriced peas). If you’re using fresh stock, there’s no need to add any liquid; if you used stock-cubes, pour on a half cupful of water to prevent the contents from sticking.

Stir the lot, then place a lid firmly on the pan. Cook for between 5 and 10 minutes on a low heat, until the Cavolo Nero has wilted down but still retains its bite.

Whilst the pan is on the hob, grate a good whack of parmesan cheese and sprinkle this over the vegetables once cooked. Fold the cheese into the vegetables, garnish with freshly chopped basil or oregano then rush to the table whilst the lot is still piping hot. Serve alongside meat, fish or use as a base to eggs florentine.

One word will sum up the lot… delicious!

Thanks for reading and bon ap!

Adam.

Deliciously Different Low Carb Ideas – Hot Smoked Mackerel, Leek & Bean-Sprout Kedgeree. Fast, fuss-free & sublimely tasty!!

kedgeree

My favourite recipes are always ones which are quick and simple, yet packed with taste & flavour. Well, recipes doesn’t get any easier or more delicious than this! Hot smoked mackerel, with buttered leeks and bean-sprouts, all bolstered by a warm & aromatic hint of curry.

The inspiration for this dish comes from the classic ‘kedgeree’ dish, first made poplar in England at the Victorian breakfast-table. The traditional version also contains eggs and rice, which you could very easily include; indeed cauliflower rice (hyperlinked) would be a stunning addition, & hard-boiled eggs are ready in no time! But I chose to prepare this as a starter, so didn’t feel the need to bulk it up too much. If you include the eggs and the rice, then this would then make a brilliant stand-alone supper, dinner or luncheon-dish. So experiment away and be sure to tell me how you get on!

As with all recipes on this website; the ingredients here are very low in carbohydrate. At about 2.5g net carbs per 100g, beansprouts are a great way to get your daily intake of vitamins and minerals; plus they’re quick to cook, which can be a real blessing when time’s in short supply! Such low levels of starch, plus the fact there’s no wheat; make this dish perfect for diabetics, gluten-intolerants or those following a ketogenic-diet (like me). Fans of the paleo-regime will also be well-catered for, so I strongly recommend everyone to give this recipe a go!

Start by finely slicing a leek, including the green leaf-tops, to add colour and flavour. Sauté these in a generous spoonful of coconut-oil & butter, or just butter if you don’t have any coconut-oil to hand. Leave to soften on the heat for a few minutes, then add a couple of cupfuls of beansprouts. Sprinkle on a good teaspoon of curry-powder, followed by a crumbled chicken stock-cube. Then add half a can of full fat coconut milk and season well.

Once the coconut milk has come to the boil (circa 1-2 minutes), lay your smoked mackerel-fillets (I used pre-cooked from the supermarket) across the surface of the vegetables, then transfer the pan to a hot oven for 10 minutes, or until the fish is piping-hot and the liquid reduced by three quarters.

Take the pan out of the oven and spoon the vegetables into broad-bowls to capture the delicious coconut-curry sauce. Then simply place a mackerel fillet atop each portion, drizzle on some of the pan-juices and garnish with a final flourish of fresh herbs.

Voila! Dinner is served. Totally delicious from the first to the very last bite; so enjoy!

Browse this and other recipes by picture on my pinterest page: country walks in ketosis pinterest.

Thanks for reading and bon ap!

Adam.

Deliciously Different Low Carb Ideas! Warm Cream-Cheese, Garlic, Avocado & Bacon Salad with Rocket & Basil – Truly Sublime!

avocado

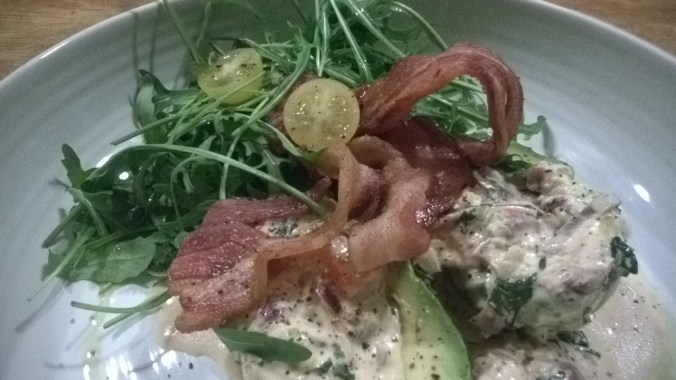
Some recipes taste so wonderful, you’d scarcely believe that they’re ready in minutes! Equally challenging is when you’re looking for something low-carb, but crave something just that little bit different! Well this dish is a winner all round… Decadently indulgent garlic cream-cheese sauce, warmly smothered over rich avocado, topped with crisp salty bacon. Truly a recipe that has it all!

I serve it here as a starter; but because it’s so quick, it would equally make the perfect ketogenic lunch or light low-carb supper. Like all recipes here, it’s suitable for diabetics or those following a paleo-plan; and as there’s no gluten; coeliacs can also dig straight in! There’s plenty to go around.

Start by finely slicing an onion and softening this on the hob in butter. After a couple of minutes, tumble in a good half-handful of cherry tomatoes and add a clove-&-a-half of finely chopped garlic. Cook these until the cherry tomatoes start to burst (circa 2 minutes) then add a couple of tablespoons of water to loosen the mix. Warm through, then remove the pan from the stovetop to rest.

Meanwhile, depending on your cooker and preferred method of cooking; grill, fry or oven-bake your bacon until deliciously crisp. As a guide to quantity, allow two rashers per person. Then transfer to one side to ‘take the edge’ off the heat.

Halve and de-stone your avocado and arrange this in a salad bowl. Pile up rocket leaves or other peppery green salad (watercress is absolutely delicious), forming an impressive mountain to one side.

Finish by chopping fresh basil leaves and adding these to the tomato & onion mix. Then stir through circa 100g or two heaped-tablespoons of full-fat cream-cheese. Once this is velvety smooth and amalgamated, pour lavishly over the avocado and drizzle a little virgin olive-oil over the salad leaves to add a bright glossy shine.

Then simply dig in! From start to finish, a sumptuous delight ready in 10 minutes flat. So enjoy!

Browse this and other recipes by picture on my pinterest page: country walks in ketosis pinterest.

Thanks for reading and bon ap!

Adam.
Top 20 Low-Carb Chicken Recipes

If you’re just starting a ketogenic- or low-carb diet, food choices can sometimes seem a little daunting! Alternatively, if you’ve already been on the plan for a while; finding inspiration for ‘what to have for dinner tonight’ can also prove a challenge!

Never fear however; County Walks in Ketosis has a huge library of delicious LCHF recipes to help along the way.

Chicken is a great option for a huge range of dishes. It’s brilliant in starters, soup or salads, and translates beautifully into rich, sumptuous dinners in a myriad of forms. Its morish yet mild taste can be coupled with exotic flavours from all around the globe; from Middle-Eastern dishes, through to classic French, American, African, Indian, Italian and of course English (he says proudly!).

Its versatility is truly its crowning feature; but it also has an added bonus – it’s incredibly quick to cook and so many cuts are readily available from the local supermarket or butcher, that practically anything is possible!

To provide a little inspiration, I’ve assembled my top 20 ‘chicken’ recipes from this blog. Simply click on the title/hyperlink below to take you straight to the relevant page.

All recipes can be browsed by picture on my pinterest page: country walks in ketosis pinterest.

1. Chinese Leaf Cabbage with Ginger & Peanuts, Served with Crispy Roast Chicken

2. Sweet Chilli Chicken with Buttery Egg-Fried Cauliflower Rice & Cheese Griddled Aubergines

3. Timbale of Chicken, St Agur & Black Olives with Basil & Pumpkin Oil

4. Yoghurt & Cumin ‘Chicken Skewers’ with Roasted Aubergine & Aromatic Cauliflower Rice

5. Warm Jerk Chicken Salad with Quail’s Eggs & Yellow Peppers

6. Warm Paprika-Chicken, Bacon, Edam & Green-Bean Salad with Tangy French Vinaigrette

7. Fiery Jamaican Chicken & Pork with Rum, Coconut & Turmeric Rice

8. Black Forest Chicken with Courgette-Noodles

9. Chinese Chilli Chicken-Drumsticks with Spicy Butternut Noodles

10. Chicken, Chorizo & Chicory Gratin with Smoked Ham, Brie & Emmental

11. Slow-Roasted Chicken with Sausage, Sage & Onion Stuffing & Rich Gruyere, Parmesan Mornay

12. Jamaican Jerk Chicken with Spinach & Coconut Cauliflower-Rice

13. Creamy Italian Pesto, Smoked-Bacon & Mascapone Chicken with Fresh ‘Traffic-Light’ Salad

14. Spatchcocked Roast Chicken Satay with Buttered Greens & Cauliflower Rice

15. Warm ‘Greek-Style’ Chicken Salad with Roasted Aubergine, Courgette, Basil & Halloumi

16. Earthy & Aromatic Spanish Chicken with Chorizo, Aubergine & Buttered Savoy

17. Classic Chicken Caesar Salad

18. Chicken in a Creamy White Wine, Tarragon-Sauce with Roasted Courgette-Gratin

19. Sage-Roasted Chicken with Creamy Forestière Mushrooms, Broccoli & Sugar-Snap Peas

20. Creamy, Mild, Cauliflower, Celery & Coconut Korma (adapted for shellfish or chicken)

Enjoy browsing and thanks for reading. Bon ap!

Adam.

Zingy King Prawns with Chilli, Lime & Coriander – a delicious low-carb lunch or starter; ready in minutes!

WP_20150211_20_06_05_Pro

Dishes like this are real proof that delicious food needn’t take hours to prepare. This zingy, maximum flavour recipe is ready in under 10 minutes flat! As such, it’s the perfect low-carb lunch or starter for anyone on a ketogenic diet; diabetics, gluten-intolerants and paleo-fans alike!

Roughly chop a clove of garlic and a red chill, followed by the stalks of your coriander. Place a wok onto a high heat and drizzle in a little oil. Add your pesto mix and sauté for a minute, before adding you prawns. Stir-fry these for three minutes max, until well heated through. Then add a good squeeze of lime juice to liven up the flavour.

Pile some salad leaves into your serving-bowl; watercress, rocket, or anything with a strong peppery flavour is ideal. Spoon your warm prawns evenly over the the mix and season well. Then return the wok to the pan, and quickly fry one egg per person, adding a little more oil if necessary. Lift the eggs onto the the salad then curl over a good handful of parmesan shavings, using a sturdy swiss-peeler or grater.

Finish the lot with a final flourish of chopped herbs and another squeeze of fresh lime-juice. Voila! Your delicious, healthy meal is ready! Certainly a dish of maximum taste, yet minimum effort!

Browse this and other recipes by picture on my pinterest page: country walks in ketosis pinterest.

Thanks for reading and bon ap!

Adam.
Timbale of Chicken, St Agur & Black Olives with Basil & Pumpkin Oil – a low carb ‘feast for the eyes & tastebuds’!

WP_20150124_20_10_06_Pro

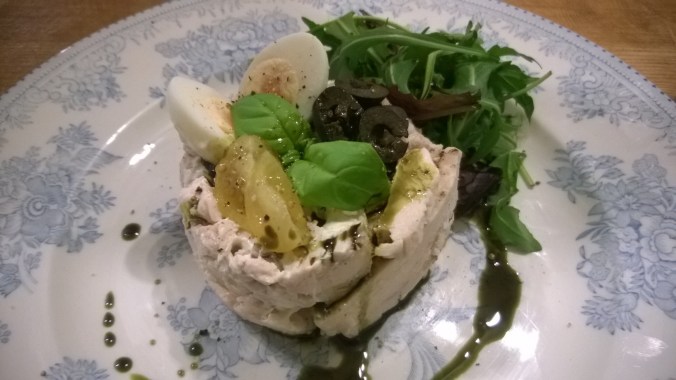
It’s amazing how simple ingredients can be given an ‘impressive twist’, by putting a little time and thought into their presentation. I always feel that if you enjoy food & spend time preparing it, the presentation should certainly not let you down. But what often looks complicated, in actual fact can be incredibly simple. This low-carb dish is a perfect example!

A timbale is a Latin American drum; so the cooking term simply references that shape. You can buy timbale-moulds very cheaply; or alternatively if you’re more the ‘make do and mend type’ (like me), you can simply line a ramekin with cling-film and press the filling into that. Turn it out onto a plate and then pile-up a little more of the mixture on top to form a dome. It’s this ‘domed shape’ which gives a timbale its name. Obviously this method is not the purist’s approach but I see no problem with 2-stage construction! I shan’t tell if you don’t!

All the ingredients here are incredibly low-carb. This means that this dish is perfect for ketogenic-dieters, and diabetics alike. It could be that you’re simply wishing to avoid the bloat of carbs, or have a gluten intolerance – either way, this dish is for you! And let’s not rule out the paleo-community – there’s plenty of room at the table: the low-carb kitchen welcomes all!

There’s equally no pressure to use the exact ingredients as I use here. If you can’t get hold of St Agur blue cheese, you can use any blue you like. If you don’t like olives, substitute these for slices of cherry-tomato or avocado. Pumpkin oil can be difficult to get hold of; so simply use olive oil instead. The purpose of this blog is to convey that low carb food can be hugely varied an versatile (when I first started this diet, it didn’t necessarily feel that way…). So use whatever you have or can get hold of reliably. The principals of each recipe remain the same, however you substitute things!

A quick note about pumpkin oil before we go any further. Why do I use this? It has a rich, deep nutty taste which is absolutely delicious! It’s also incredibly thick and has a dark glossy burnt caramel colour. This means you can get that wonderful restauranty ‘drizzle’ effect, without the carb-content of balsamic (or the price tag – balsamic vinegar is only thick like this at the top end of the market; cheaper ones tend to be thin and runny so don’t drizzle as well, tending to run and look a little ‘thin’).

Start by lining your ramekins or timbale-moulds with cling-film and a little oil. If you’re using raw chicken-breasts for this recipe, poach these in chicken stock for 20 minutes until cooked through, then leave to cool and slice. I have to admit to using pre-sliced, cooked chicken-breast from the supermarket. It was ‘reduced’, so I was looking for an interesting thing to do with it. Whether pre-sliced or home-cooked, the technique is the same! Arrange your sliced chicken onto the bottom of the mould and then up the sides to form a ‘shell’. If it doesn’t stay put, you can do it in layers by spooning in a little of the filling to support it, then lining up the next layer, supporting it with more filling &tc.

Into a small mixing-bowl, crumble a handful of blue cheese and dollop in 4 tablespoons of crème fraîche. Finely slice black-olives and add these to the mix and season well. Finally stir through some chopped basil and squeeze in a little lemon juice for piquancy. Spoon this into the centre of your moulds, pre-lined with the sliced chicken. Gather the cling-film up round the top and press well with the ball of your hand to ‘cement’ the mix in place.

Now unwrap the cling-film from the top-surface and upturn the moulds onto your serving-plates. Shaking gently to dislodge the ramekin, lift these off then carefully remove the cling-film. The chicken should remain in place, all held solidly together by the creamy blue-cheese filling. If you need to poke and prod a couple of slice back into place, then this is easily done. I’m very happy with a ‘rustic feel’ – this is home-made food after all!

Garnish the top with more sliced olives, and basil, plus anything yo have to hand to ‘add theatre’. I used a quail’s egg for each one and a slice of bright yellow cherry-tomato.  Yellow pepper would equally look stunning, as would white radish, cucumber or cress.

Ball a little green salad to one-side and drizzle on some pumpkin-oil or your preferred dressing of choice. Hey presto you’re ready to go! Simple, stunning and sublime! Give these a try – you’ll be glad you did! All done in under 15 minutes flat!

Browse this and other recipes by picture on my pinterest page: country walks in ketosis pinterest.

Thanks for reading and bon ap!

Adam.

Smoked Bacon, Parmesan & Mozzarella Soufflés – low carb, high impact!

WP_20150123_21_01_31_Pro

This dish can only be described as a textural symphony! Picture eating something the texture of clouds, interspersed with pools of stringy, melted mozzarella & the chewy crunch of salty smoked bacon. Well this recipe has it all!

Don’t be put off trying these because you think soufflés are difficult or fiddly. They’re actually very simple to prepare; all you have to do is understand the process, then you’re off and away! So what is that process…?

When you cook an egg it turns from liquid to solid. You see this when you fry an egg, scramble it, poach it &tc. It’s the protein which solidifies in heat; and a soufflé is no different from this. The act of a soufflé rising is the same as a cake. Hot air rises, which lifts the mixture upwards. Then, once the right temperature is reached, the heat solidifies the egg-proteins and the air-bubbles are ‘locked’ in place. Meringue has the same process – the proteins form a hard, crystalline structure which supports and holds up the rest of the mixture – quite simple, and quite marvellous!

If the egg-whites hold something up, what is it they’re holding? The answer to this is your soufflé mix, which carries the flavour of whatever you’re cooking. In this recipe I use parmesan, mozzarella cheese and bacon, but the process is the same for all. Whatever your ‘flavour-bearing mix’ is made of, you need to ensure that it’s the texture & consistency of melted chocolate. It’s that easy. Follow this rule of thumb and you’ll have perfect soufflés every time!

Before I jump the gun and detail the recipe in full, it’s worth noting that these are wonderful for a ketogenic diet, as they contain virtually no carbohydrate! This makes them ideal for diabetics or those who do not include gluten in their regime. You can make soufflés with no ‘solids’ at all; just the basic ingredients. This means they’re cheap, versatile and incredibly quick! Now do you see why I love them?

Start by cutting 6 smoked bacon rashers into a fine dice. If you have pre-cut ‘lardons’, all well and good. Fry these in a little butter for 10 minutes, or until the bacon is brown and crispy around the edges. I used 6 rashers for 4 soufflés. Once ready, remove from the heat and drain the bacon on kitchen-towel.

Whilst the bacon is cooking, you can start your egg-whites. In a clean mixing-bowl (I use a copper bowl as this stabilises the whites far better than anything else); separate 4 eggs, placing the yolks in a smaller bowl to form your mix. When it comes to separating eggs, I must admit to ‘not being flashy’. I simply crack them on the side of the bowl and strain the white through my fingers.

Once your eggs are separated, whisk the whites until they form stiff peaks. Volume should be minimum 8 times what you started with, and you should be able to upturn the bowl over your head and the mixture stays in situ (if it doesn’t then you have only yourself to blame!). The whisking forms valuable aerobic exercise for the cook. I strongly recommend that you do it by hand and don’t cheat by using an electric whisk! This way, you get to ‘understand’ the ingredients more, and get a true feel of how different foodstuffs behave.

Now prepare your soufflé dishes. Butter these liberally with a piece of greaseproof-paper. Your soufflés will rise better if you give them something to climb up, other than just butter. What do I mean? They’ll climb the walls of the dish a lot more reliably if they get a handhold – sprinkle some grated parmesan around the ramekin, all over the butter. This gives them a ‘rough surface’ to grip onto as they rise; much like a trellis!

Into the bowl with the egg-yolks, scatter in a generous handful of grated parmesan cheese and a half-dessertspoonful of Dijon mustard. Follow this with your crisped bacon and season well. Now bear in mind my rule of thumb above. You want this mix to be the consistency of melted chocolate. To achieve this, mix in double-cream until you have the right texture. You shouldn’t need much; three to five tablespoons maximum.

Now scrape some of your egg-whites to the side of their bowl and add your soufflé-mix. This will need to be folded into the whites with a good metal spoon. If you simply mix this in, you’ll knock out all the air. Folding is exactly as it sounds – you turn the mixture over on top of itself, so that gravity does the work, not your spoon! At no point should you be cutting through the middle of the mix, you just want to continue lifting and turning until the two are incorporated. It should be a pleasing, yellow, moussey texture, with traces of white still visible and air bubbles prevalent throughout.

Ladle the mix into your prepared ramekins until it’s a few millimetres shy of the top. Cut a ball of mozzarella into half-inch chunks, and drop a few pieces of the cheese into each ramekin. These will sink slightly into the mix, but that’s exactly as we want things. The cheese ‘melts’ into the soufflé, forming pools of molten mozzarella beneath the surface. So if the cheese sits on top of the mix, we wouldn’t achieve the right effect!

Place the ramekins onto a baking-tray and into a hot oven they go for circa ten minutes. If your oven has a glass-front, you can have the joy of watching them rise. I’m fortunate enough to have an aga, which means I can open the door and peek in with no danger of the temperature falling.

You’ll know they’re ready when well risen over the surface of the ramekin. The top should be lightly firm to the touch and the surface should be evenly coloured a light ‘caramel’ shade. I always like to have a slight crispness on top, to contrast with the smooth inner, but that’s up to you. Experiment with your results – you’ll soon find out how you like them best.

Serve up straight from the oven. The top will sink down within a couple of minutes, so make sure your admiring onlookers are already in place at the table when you take the dish out of the oven! All in all, incredibly straightforward, fuss-free and delicious – oh, and yes; a trifle grand!!

Browse this and other recipes by picture on my pinterest page: country walks in ketosis pinterest.

Thanks for reading and bon ap!

Adam.
Rich, Aromatic Crayfish & Coconut Mulligatawny Soup – a delicious low carb jewel!

WP_20150121_19_52_00_Pro

Food fulfils many functions in life. Beyond mere fuel, it can represent warmth, nurture, togetherness, nostalgia, adventure and sometimes even a challenge! And then on rare occasions, food can go beyond all these things and offer something more; something just that little bit special. At times, a dish can bring complete surprise and delight; it can make you forget everything, close your eyes and utter a blissfully contented ‘mmmm‘. At such times, food can be a real treat, pure and simple!

Well this recipe is certainly that; I truly can’t praise it enough! It’s warm, filling, indulgent, aromatic, rich, satisfying… the list goes on and on! But normally when food attracts this kind of praise, there’s three words you don’t expect to hear when describing it – quick, simple and straightforward!

The origins of this strangely named dish take root in the Anglo-Indian melting-pot of the 18th century. As the British Empire opened up spice-routes into London from the East; a brave new world of exotic flavours opened up, and the English love affair with Indian cuisine was born. The rapidly growing new wave of aspiring middle-classes were first to jump on this band-wagon; albeit with little understanding of this trend, or any actual knowledge of what they were eating. In the Sporting Magazine of 1798, one gentleman writes: “I supped … in his house on Mulagatoney or pepper-water.

Pepper was the one ‘known & recognised’ flavour that people of the time could latch onto. As a result, a myriad of rather queer and extraordinary recipes were published, attempting to capture the flavour of aromatic Eastern cuisine through the use of existing local or readily available ingredients such as peppercorns and onions. I laugh to think at how these first attempts as ‘kurrys’ must have been received; especially in light of the fact that no-one had any real point of comparison or yardstick against which the cook’s efforts were to be judged! Thankfully, today’s larder is much better stocked and we’re able to take full advantage of the world’s rich & varied food-palette at comparatively low cost and effort.

The words ‘ketogenic diet’ would seem as strange to 18th century ears as the word mulligatawny itself. Well this recipe is a perfect low carb dish. Blood sugars will remain stable, with no ramping of insulin-levels; making it the ideal concoction for diabetics, gluten-intolerants or those on a paleo-plan.  I strongly urge you to give it a try – you won’t regret it!

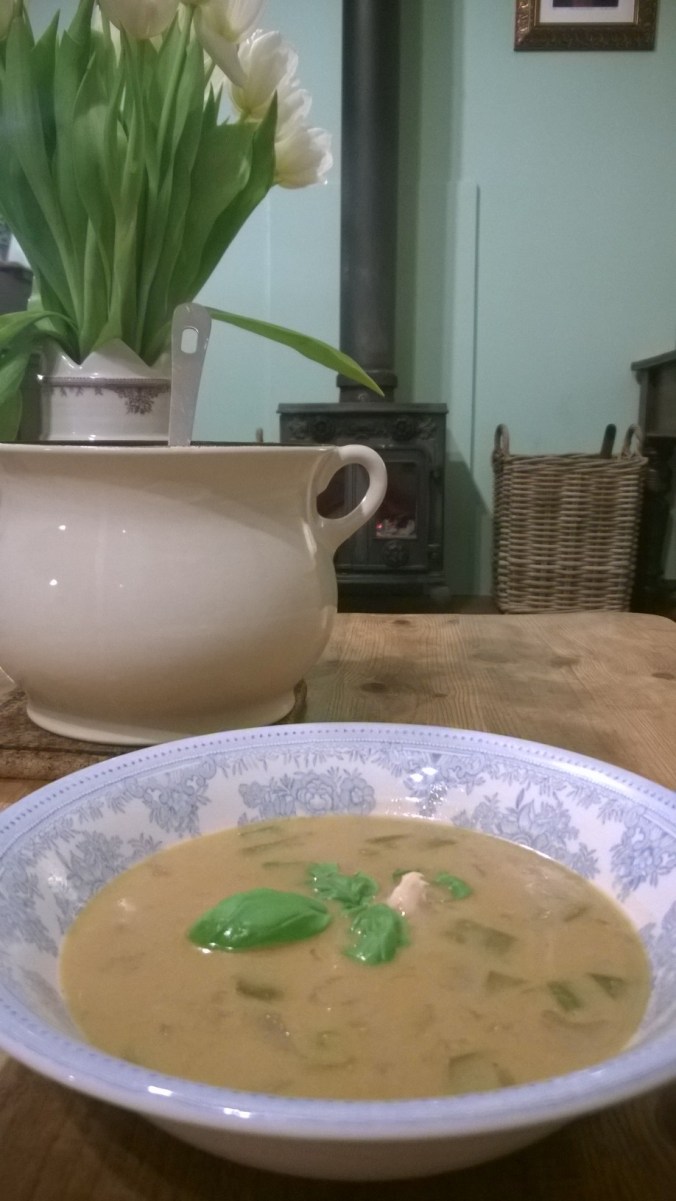
Finely slice an onion and two sticks of celery, then add these to a heavy-based saucepan with a splash of oil and a large spoonful of butter. Saute these on a medium heat for a few minutes, then add a crushed clove of garlic and sprinkle in the following: one teaspoon of chilli-powder, half a teaspoon of ground fenugreek, one teaspoon of cumin, a teaspoon of ground coriander and a good grind of pepper. Let these cook through for a minute or so, then pour in two pints of chicken stock (or stock-cubes and water) and bring to the boil.

Once the soup is at a rolling simmer, add the contents of a can of full-fat coconut milk, then lower the heat and leave this to reduce until the mix is thick and glossy, resembling the texture of single cream (circa 20 minutes).

Finely slice a generous handful of mange-tout and add these to the soup, cooking them until tender for a further 2 or so minutes. Then empty in your crayfish tails (or prawns if you prefer). Let these heat through for a further couple of minutes, then give it a good taste to adjust the seasoning. You’ll need to add a small sprinkle of sweetener to balance and round off the flavour. Do this a little at a time, until the levels are to your liking; then finish the dish with a good squeeze of lime or lemon-juice and a handful of chopped coriander.

Hey presto, your delicious low carb mulligatawny soup is ready! Ladle into bowls and eat whilst still piping hot! I’ll wager everyone will go back for seconds – there was not a drop left in the pan when I made this; and once you’ve tasted it, you’ll soon see why!

Browse this and other recipes by picture on my pinterest page: country walks in ketosis pinterest.

Thanks for reading and bon ap!

Adam.

Warm Jerk Chicken Salad with Quail’s Eggs & Yellow Peppers

WP_20150113_21_13_55_Pro

Salads will always be a wonderful thing, but in the winter months, we often crave something a little more hearty and substantial.  The perfect compromise therefore presents itself in the guise of warm salads – they’re a great way to get your essential daily vegetable fix whilst still retaining the health-promoting properties of raw-veg. And all in a way which delivers that all important ‘fill-factor’ – what could be better?

Another bonus of warm salads is that they’re a great way of using up leftovers. The chicken in this dish came from a roast chicken we had the day before that was too much for us to plough through in one sitting. Tried and tested principals of home economics dictate that the ‘spoils of war’ should always be recycled, and return to fight another day! The roast chicken was therefore no exception to the rule – if leftovers can stretch to another meal, then the cook has done their job!

All the ingredients here are low-carb; thus perfect for diabetics, ketogenic-dieters and those on a paleo-regime. If you have a gluten-intolerance or are coeliac; then you’ve equally come to the right place! There’s no wheat or other nasties which will leave you feeling bloated; just good honest old-fashioned low carb fare; all with a modern spicy twist!

Before I go any further, just a quick word about allspice. Please forgive me if I’m preaching to the converted, but this was once a gap in my own knowledge-base. I therefore feel honour-bound to save others from the same mistake which once ruined a ‘high-hopes’ recipe… Allspice is a berry, dried then ground into a powder. It is not a spice-mix, made up of generically blended ‘Christmassy’ spices, for use in mince-pies &tc. That is mixed spice! Sorry again if you already knew this; I shan’t mention it further. Consider yourself well & truly told!

Because this is a quick lunchtime dish or starter, this recipe for jerk-mix is a ‘tribute’ version for speed and convenience. For the full thing, check out the following hyperlink – Low Carb Jamaican Jerk Chicken.

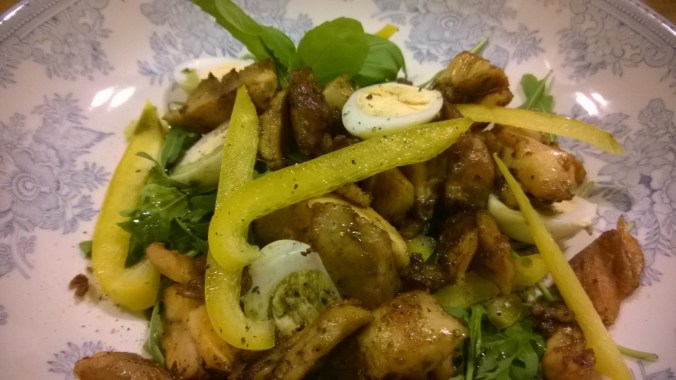
Start by placing your chicken pieces (cooked or raw depending if leftovers or not) into a large mixing-bowl. Add half a teaspoon of garlic-powder, 1 teaspoon of dried chilli, 1 teaspoon of ground allspice, a tablespoon of lemon-juice, a teaspoon of dried thyme, and a heaped teaspoon of xylitol sweetener. Chilli always requires a bit of sweetness, so I’d always advocate the use of sweetener in such things! Mix these all together, then leave to stand whilst you prepare your other ingredients.

Bring a pan of water to the boil, then cook your quails’ eggs for 3 minutes. Then transfer these to a bowl of cold water to cool down to room temperature. If you don’t have quails’ eggs, you can equally use normal hens’ eggs. If you’re a regular visitor to this blog, you’ll realise I live slap bang in the middle of the countryside, where such things are readily available. I understand however that in other areas, such things may be more difficult to come by. I leave the exact ingredient-choice up to you therefore – the principals are the same! Once the eggs are cool, shell them and rinse in cool water.

Now we’re ready to cook our chicken. Heat a glug of oil and a little butter in a thick-bottomed pan, then add your chicken when the fat is piping hot. Cook until brown and caramelised on all sides; between 5 and 10 minutes, depending on whether you used fresh or raw chicken. Then remove the pan from the heat and set this to one side whilst you assemble your salad.

Finely slice half a yellow pepper, then layer this interspersed with your salad leaves into the centre of a serving-bowl. Slice your eggs in half and arrange these at intervals, then spoon your chicken all over the top with a generous hand! Pour any pan juices over the surface, then garnish with a squeeze of lemon and torn fresh coriander leaves.

Voila! Your delicious warm low-carb salad is ready. All in under 20 minutes from start to finish. I’ll wager it’ll be gone in half the time however!

Browse this and other recipes by picture on my pinterest page: country walks in ketosis pinterest.

Thanks for reading and bon ap!

Adam.
Smoked Cod, Leek, Pepper & Parmesan ‘Pesto Parcels’ – delicious low carb fast food!

WP_20150119_20_36_42_Pro (1)

Sometimes all we want is something that’s quick and easy but in no way compromises on taste! Well this recipe is just that! Team it with a green salad as a starter or light lunch; or serve with steamed vegetables and roasted celeriac for a more substantial main course. Either way, this is a perfect dish for those evenings when you’re late home from work and don’t fancy using every pan in the kitchen! A chopping-board, sharp knife and a baking-tray are all you need; then 15 minutes later, dinner is served!

The taste-combination of smoked cod, parmesan and basil-pesto is divine! The three flavours are all equally robust, so they complement & carry each other in perfect equilibrium. The vegetables go velvety smooth and the cheese melts down into the sauce, forming ‘swirling layers’ of flavour – it’s amazing how something so simple can deliver such profound results!

There’s practically no carbohydrate here at all, so ketogenic-dieters and diabetics will be in ‘food heaven’. As will those on a paleo-regime or coeliacs, as there’s no gluten to worry about; just food as nature intended!

On a sturdy chopping-board, finely slice half a leek and half a yellow pepper. Pile these into the centre of generous tinfoil sheets, then spoon a teaspoon of basil-pesto on top of each pile. Shave some parmesan curls into the centre with your knife, then lay your smoked cod fillets across the lot.

Grind on some black pepper, then fold the edges of the tinfoil into the centre to form square ‘parcels’. Onto the baking-tray they go, then into a hot oven for 10 minutes until the fish is cooked through.

When they’re good and ready, simply unfold the parcels and spoon the fish into your serving-bowls. Pour the vegetable contents and sauce all around, then pile up your green salad on the side. Hey presto, dinner is served!

Browse this and other recipes by picture on my pinterest page: country walks in ketosis pinterest.

Thanks for reading and bon ap!

Adam.

Top 10 Low-Carb Starters

If you’re just starting a ketogenic- or low-carb diet for the New Year, food choices can sometimes seem a little daunting!

Never fear however; County Walks in Ketosis has a huge library of delicious LCHF recipes to help along the way.

The ketogenic-diet has no restriction on calories, portion-control or the quantity of food you eat. As a result, delicious starters are very much to be enjoyed, as long as they adhere to the broad range of keto-friendly foodstuffs. This range is so wide however, that the only problem you’ll experience is deciding what to cook first!

To provide a little inspiration, I’ve assembled my top 10 ‘starter’ recipes from this blog. Simply click on the title/hyperlink below to take you straight to the relevant page.

All recipes can be browsed by picture on my pinterest page: country walks in ketosis pinterest.

Top 10 salads:

1. King-Prawn, Courgette & Mascapone Roulade

2. Oven-Warmed Camembert with Truffled Bresaola & Rocket Leaves

3. Thai Smoked Haddock Fish-Cakes

4. Creamy Broccoli & Stilton Soup

5. Smoked Salmon, Prawn & Quail’s Egg Florentine

6. Asparagus, Cream-Cheese & Parma-Ham Tartlets

7. Timbale of Leek, Parmesan & Crayfish Tails

8. Norfolk Crab, Avocado & Brown Shrimps

9. Fiery Padron Peppers

10. Pan-Seared Fillet of Cod in Vermouth & Basil

Enjoy browsing and thanks for reading. Bon ap!

Adam.

Top 10 Low-Carb Salads

If you’re just starting a ketogenic- or low-carb diet for the New Year, food choices can sometimes seem a little daunting!

Never fear however; County Walks in Ketosis has a huge library of delicious LCHF recipes to help along the way.

Salads are great as a quick low-carb lunch, healthy starter or side-accompaniment to a main-course. They’re ready in minutes and are bright, colourful and fuss-free!

To provide a little inspiration, I’ve assembled my top 10 salad recipes from this blog. Simply click on the title/hyperlink below to take you straight to the relevant page.

All recipes can be browsed by picture on my pinterest page: country walks in ketosis pinterest.

Top 10 salads:

1. Paprika-Chicken, Bacon, Edam & French-Beans

2. Spinach, Asparagus & Goat’s Cheese

3. Emmental, Smoked Ham & Avocado

4. ‘Russian Millionaire’s’ Salad (you’ll quickly see what I mean)

5. Padron-Peppers with Parmesan & Salami

6. Greek Chicken & Aubergine

7. Smoked Mackerel & Green Beans

8. Avocado, Bacon & Blue Cheese

9. Prawn, Pepper & Celeriac

10. Classic Caesar Salad

Enjoy browsing and thanks for reading. Bon ap!

Adam.

Warm Paprika-Chicken, Bacon, Edam & Green-Bean Salad with Tangy French Vinaigrette – a fast, delicious keto lunch!

WP_20150102_12_41_11_Pro

This dish is everything a salad should be – fast, effortless and full of flavour! Just the thing for a delicious low-carb lunch or nutrient-packed starter!

I always feel that salads should be as visually pleasing as they are rich in flavour. The addition of bright yellow and red cherry-tomatoes serve to lift the dish and provide a splash of much needed ‘cheery colour’ amidst the grey of winter!

All ingredients are low in carbohydrate, so are suitable for a ketogenic diet, or those with diabetes or a gluten-intolerance. But as always, the contents of this salad can be varied in line with whatever you have available at the time. Chicken, bacon and cheese however form a delicious taste-combination which delivers outstanding results every time!

Details of how to make the vinaigrette can be found under the following link: classic French vinaigrette. I strongly urge you to give this a try. It’s incredibly easy and will rapidly become a store-cupboard staple. You can use it to dress pretty much any salad, as well as a lot of hot dishes, to include vegetables such as celeriac, winter cabbage or sautéed peppers. Its moreish tangy flavour will complement a huge range of ingredients – no kitchen-cupboard can be complete without it!

Start by pan frying your bacon in a little butter to prevent it sticking. Once nice and crisp, lift out of the pan and place on kitchen-paper to drain. Add your chicken to the pan (I used leftovers from another dish, but you can equally use thinly sliced strips of chicken breast or finely diced brown meat, such as thigh or leg). As soon as the chicken is in the pan, dust it lightly with a generous sprinkle of paprika and season well. Continue to sauté, stirring occasionally, for a good 5 minutes, until the outsides start to crisp. Then lift the chicken out of the pan and set to one side to cool slightly.

Keep the pan on the heat and turn up your stove to the highest temperature. Pour in a centimetre of water and bring this to the boil. Whist the water is coming to the boil, top and tail French beans then add them to the pan when the water is ‘rolling’. Cook for two minutes then plunge into cold water so that they retain their vibrant colour and crispness.

The final usage for your pan is to cook a couple of eggs (I love one-pan dishes – it really economises the washing-up!). I used quails eggs because we had them in after Christmas, but hens’ eggs are an equal delight! The cooking method is quite up to you – you can poach, fry scramble or make into an omelette then slice to form strips. I opted for the quick sautéing method – one minute and they’re done! Once cooked, transfer the eggs to kitchen-towel to drain.

Into your salad bowl, place a good couple of handfuls of fresh green salad and follow this with your drained green-beans (I always pat them dry with kitchen-paper to avoid a ‘watery salad). Ladle a couple of spoonfuls of vinaigrette over the top and mix in well with your hand or a spoon. Season enthusiastically, then start to layer up your bacon and chicken.

Disperse the above with slices of cherry tomato and thinly chopped Edam cheese. If you don’y have Edam, any comparative cheese will do. Preferably you want something with a bit of texture, to serve as a contrast against the other ingredients. For this reason alone I’d avoid soft cheese, but I certainly shan’t judge you if you over-rule this advice!

Once all your ingredients (chicken, bacon, cheese, tomatoes, salad-leaves and eggs) are stacked into a delicious pile; finish the dish with a final flourish of vinaigrette and some chopped basil.

Low-carb doesn’t get much better than this! And all in 10 minutes!

Browse this and other recipes by picture on my pinterest page: country walks in ketosis pinterest.

Thanks for reading and bon ap!

Adam.
Classic French Vinaigrette – the ultimate salad dressing (plus it’s low carb!)

WP_20150102_12_27_16_Pro

You can’t beat a classic! French vinaigrette must be the definitive dressing for salad. Rich, thick and tangy, it’s incredibly versatile and can be served with a myriad of different things. As such, it’s a store-cupboard staple, and no kitchen can be considered complete without it!

Despite its wonderful taste and ease of preparation, few people seem to get it right. The dressing should be thick and emulsified; more of a coating than a pouring dressing. The flavour should have just the right amount of sharpness, thereby able to cut through strong ingredients such as cheese, smoked fish and cured meats. I always think it’s at its best when served simply however; tossed over crisp green leaves or crunchy French beans. When topped with a light shaving of parmesan, such dishes become a delicious meal in themselves!

A common mistake with vinaigrette is the use of olive oil. This will result in an unattractive suspension which quickly separates. You’re left with a green sludgy liquid which tastes as bad as it looks. In my experience, the best oil to make vinaigrette is sunflower oil. It’s light in flavour, which allows the other ingredients to deliver the taste. If all you can taste is oil then there’s very little point! You may as well stick with that and save yourself the effort!

Another positive is that French dressing is also incredibly low in carbohydrate. This makes it brilliant for a ketogenic diet, and eminently suitable for diabetics or those with a gluten-intolerance. Keep it in the cupboard to ‘dress up’ a quick low-carb lunch or starter. You’ll soon wonder how you ever got by without it!

The recipe is incredibly cheap and easy to follow. I always make it in a big batch, as it keeps for months. The below makes just over a pint and a quarter, so you can keep it in a sealable Kilner jar, ready on hand for whenever you need it.

Into a food-processor with the blade attachment, rip in a good handful of fresh parsley leaves and crush in two cloves of garlic. The parsley serves to ‘calm’ the taste of the raw garlic, thereby delivering a light, mellow flavour, rather than a dressing which tastes of garlic alone. Sprinkle on a large pinch of coarse-salt and grind in a good whack of pepper.

Pulse these in the food-processor until the parsley is finely chopped. At this stage, spoon in two large tablespoonsful of Dijon mustard and squeeze in the juice of one lemon. Measure 100ml of white-wine vinegar and pour this on top, then start the motor to form a busily whirring pale-yellow mix.

Into a jug, measure out 600ml of sunflower oil and then pour this very slowly into the processor’s funnel, the motor going all the time. You want the oil to be added as a constant drizzle. Too much to quickly will mean the mix separates and does not emulsify. The dressing will soon thicken to a thick mayonnaise-like consistency. Once all the oil is incorporated, stop the motor and give the dressing a taste,

The flavour should be pleasantly sharp, but not so vinegary as to make you wince. If it needs more oil, add this slowly until the flavour tastes right. Hey presto, your dressing is done!

Spoon the vinaigrette into a Kilner-jar and then gaze lovingly at it with pride! Your salads will soon become the envy of all your friends and lunches need never taste flat again!

Browse this and other recipes by picture on my pinterest page: country walks in ketosis pinterest.

Thanks for reading and bon ap!

Adam.
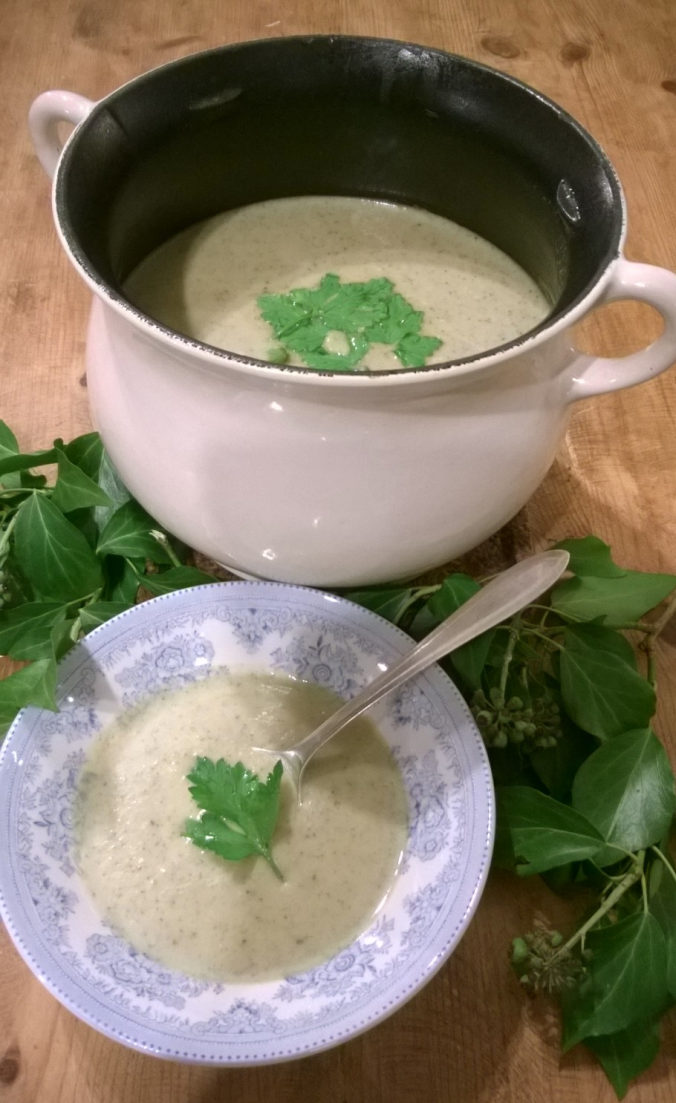
Creamy Broccoli & Stilton Soup – hearty, filling & low carb…

soup

Winter is a time when food must be hot, hearty and plentiful. It’s cold outside, and the kitchen provides the perfect remedy to that; both in terms of the cooking itself and the delicious dishes it produces.

Whenever I think of Winter, hot mugs of soup come immediately to mind. Soup is incredibly easy to make and wonderfully filling. It’s also very economical and a great way to use up any leftovers which can’t quite make it in quantity to stand on their own two feet!

This broccoli and stilton soup makes a hearty low-carb lunch or starter. As such, it’s great for diabetics or those on a ketogenic diet because the only carbohydrate in the whole thing is cellular, coming directly from the broccoli itself (2.13g net carbs per 100g = very low!). It will keep for several days in the fridge, but I very much doubt it will last that long!

If you don’t have stilton, any firm blue cheese will do (danish blue, st agur, roquefort &tc). You don’t need much, which is why this dish is great for using up odds and ends. We always buy lots of stilton & blue cheese at Christmas time, so often end up with various assorted bits of this and that. They all go in however, with simply stunning results!

Take a large onion and roughly dice. Place a deep casserole onto the hob, with butter and a little oil, then add the onion and cook this until it starts to turn translucent.

Whilst the onion is looking after itself, chop your broccoli and rinse lightly. In it goes to join the onion, then pour on water so that the vegetables are well submerged. Don’t go overboard on the water – it’s easy to add more, but you’ll end up with watery soup if you add too much. Rule of thumb? Just enough to cover the contents; more later…!

Crumble in a couple of chicken stock-cubes & dried herbs, then place the lid on the pan and simmer for 20 minutes until the vegetables are soft enough to collapse when pressed against the side of the pan with the back of a wooden spoon.

Finely dice your blue-cheese, then sprinkle this in (quantity to taste). Stir around, so that the cheese begins to melt; then go in with a stick-blender until smooth. Pour in a splosh of cream, then taste to check for seasoning. If you need a little water to thin things down, then add this in small quantities until your reach the desired consistency.

Ladle into bowls and eat whilst piping hot. Just the thing for a cold, winter’s day!

Browse this and other recipes by picture on my pinterest page: country walks in ketosis pinterest.

Thanks for reading and bon ap!

Adam.

The Low Carb Christmas – Smoked Salmon, King-Prawn & Quail’s Egg Florentine.

salmon

The festive table at Christmas-time should be a thing of beauty. With a little care and attention, true wonders can be created which please & delight the palette as much as the eye! These florentines are one such thing.

The classic combination of spinach, eggs and salmon is one that cannot fail to impress. It’s packed with flavour, rich, satisfying & decadent; in short, everything a Christmas-dish should aspire to be. This recipe may look complicated, but it’s actually incredibly straightforward. Your diners won’t know this however; they’ll think you’ve been toiling over a hot stove for hours, rather than quickly assembling a few components which can be cooked ahead of time. And besides; even if this were fiddly; if we can’t go to a little effort at Christmas time, when can we do it?!

Due to the incredibly low carbohydrate content, this dish is perfect for diabetics or those on a ketogenic diet. It won’t impact your blood-sugars and in no way has that feeling of being a poor substitute for something higher in carbs.  ‘The proof is in the pudding’ however, so I urge you to try this; you’ll quickly see what I mean.

I’ve prepared this dish as a starter, but it could equally be served as a sumptuous low-carb breakfast on Christmas day, or a light supper dish, accompanied by green salad. This versatility is the final string to its bow. Without further ado therefore…

Start by boiling your quails eggs for 2.5 minutes, no longer. You’ll need two per person, so calculate your quantities accordingly. After that time, remove the eggs from the pan and plunge them into icy cold water. This will arrest the cooking process and ensure that they retain their softness. Leave them in the cold water until thoroughly chilled, then peel.

The best way to peel them is to ‘tap’ the eggs all over on your chopping board, then roll them between the palms of your hands, as if you’re forming balls. The shell will then come off in one delightfully easy peel. If you’re truly adept; you can even remove the whole shell in one! Don’t form this as your benchmark however; only true professionals manage this, and the process is not sufficiently enjoyable to warrant all the practice it requires!

The next thing to get on with is to make your spinach mix. If you’re using fresh spinach, you’ll be surprised at how much you need. It has the rather selfish habit of wilting down to nothing! Allow circa 150g per person, which will end up with approximately a large dessert-spoonful per head. As an aside, the spinach-paradox is often how I feel about my weekly food-budget!

Melt a knob of butter in a pan and add your washed spinach. Crush in a large clove of garlic and leave the pan on a low heat to cook through. Crumble in a chicken stock-cube for background flavour and season well. Once the spinach has wilted down thoroughly, pass it through a sieve to remove any excess liquid. Leave this to cool, then stir through a generous grate of parmesan cheese.

The element which binds the whole thing together is a herby cream-cheese. Weigh out roughly 75g per person, then add this to a mixing-bowl. Sprinkle in some freshly chopped herbs (tarragon or basil are good), season well, then pour in a tablespoon of lemon-juice and a good glug of double-cream. Whisk with a firm arm, until the ingredients are all evenly dispersed and the texture is velvety smooth. Taste to adjust the seasoning and then set to one side.

When all is room-temperature; you’re ready to start assembling. Lightly oil a metal cooking-ring (if you don’t have any special rings, then an upturned pastry-cutter will suffice) and place this onto your serving-plate. Spoon a large dessert-spoonful of the spinach mix into the ring and press down with the back of a spoon. Top this with a generous dollop of cream-cheese, piling this into the centre. Do not smooth this yet! Halve your eggs and place the cut-side facing outwards against the edge of the mould. Now smooth and flatten your cream-cheese mix, so that it holds the quails-eggs neatly in place. De-tail your prawns then arrange circa four on top of the cheese layer, to form a solid bed for your salmon. Finally, twist your smoked-fish into a spiral and place it like a candle-flame atop your prawns. Remove the ring carefully, then garnish the whole thing with a squeeze of lemon juice and a few strands of grated zest for colour.

The dish is now ready for service. Your efforts will not go unrewarded – it’s every bit as delicious as it looks!

Be sure to keep reading for more festive recipes over the coming weeks! Check out The Low Carb Christmas for details.

Enjoy this magical season and thank you for reading. Bon ap!

Adam.

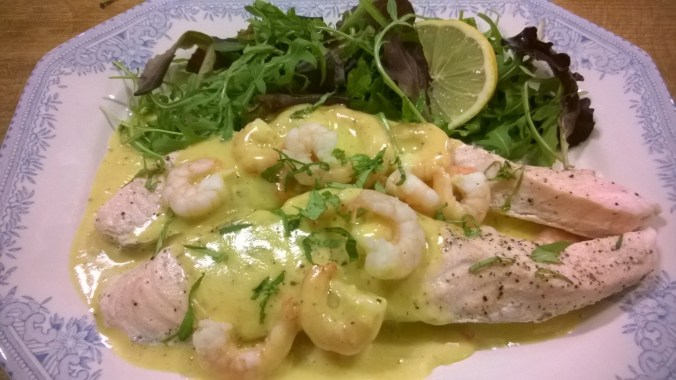
The Low Carb Christmas – Wine Poached Fillet of Salmon & Prawns in a Classic Hollandaise Sauce

WP_20141203_20_21_12_Pro

Christmas is a time of perfection. From the baubles hung lovingly on the tree, to that one ‘ ideal’ present you’ve agonised over for weeks; it’s a time when we should aspire to the best in all we do. And for me, that aspiration begins in the kitchen.

For a few precious days, we finally have the time to cook old favourites & prepare things which are just that little bit special.  And what could be more special than classic poached salmon with hollandaise sauce?

Hollandaise is a thing which many people fear; but in actual fact, it’s really rather simple. The key is to understand what you’re doing, so you’re aware why & how things could go wrong. Once this is clear, so many of the classically ‘fiddly’ things we tend to avoid suddenly become easy. You’ll wonder what all the fuss was about, and achieve flawless results every time.

Hollandaise is also a ketogenic dream – a rich, velvety-smooth sauce consisting largely of melted butter and egg yolks. There’s precious little carbohydrate here, so diabetics, paleo-followers and gluten-intolerants can equally share in the luxury without fear of impact to blood-sugar.

There’s a saying that a bad workman always blames his tools. Well in the case of hollandaise, this is not quite strictly true. If your cooker has poor temperature control, or your pan is thin with ‘hotspots’ on the base; you’ll struggle with this. Why? The trick is a slow heat, where the sauce thickens evenly throughout. So many failures can be attributed to inadequate equipment – in this instance they’re in no way a reflection on the cook!

So what is it we’re doing when we make hollandaise…? I’m assuming you’ve made scrambled eggs before. The mixture starts runny, then the eggs solidify and form lumps as they cook. This is exactly the process that will lead to a lumpy ‘separated’ hollandaise. We don’t want the sauce to reach a temperature where the eggs go solid. Instead, we want the low heat to merely thicken the egg yolks so that the sauce is rich and velvety, like custard. The pan should never reach the point where you can no longer touch the outside because it’s to hot. Abide by that teaching and you’ll never go wrong!

My recipe for this is uncomplicated and simple to follow. There’s no need for bain-maries or several different saucepans. Just the one will do . I aim to keep things as ‘pared down’ as possible. There’s enough washing-up at this time of year without adding to it unnecessarily.

Start by separating 3 eggs and placing the yolks into a small, heavy bottomed saucepan. I use copper because of the heat-conductivity, but anything of quality will suffice. Add white-wine vinegar to the yolks; my guide as to quantity is visual. You want the same volume of vinegar by eye as the size of one of your egg-yolks. Whisk this together and grind in pepper and a pinch of salt.

On the cooker’s lowest heat, warm the mix through, whisking slowly the whole time. Stick your little finger into the pan, if it feels around body-temperature, you’re there. Weigh out 4oz of salted butter (the butter must be at room-temperature!) and break this into little chunks into the pan, whisking as you go. At this point it will resemble a nightmare of yellow lumps in a slightly unattractive yellow foamy liquid. Do not worry; the butter will melt in nicely. Squeeze in a teaspoon of lemon-juice and place the pan back onto the hob, still at lowest heat.

Whisk the contents continually. You don’t want the mix to turn to scrambled eggs. This will happen if any of the mix catches on the bottom of the pan or the heat is too high. Remember the ‘outside of the pan rule’. As the butter slowly melts, the sauce will become smooth. You’re now at the point where it will gradually begin to thicken. Keep the pan on the hob and whisk until you have the texture of custard. If it doesn’t thicken after two minutes, turn the heat up very slightly – you’ll get there in the end. It is just a matter of patience. The sauce should end up a creamy yellow, on account of the egg-yolks. It will be glossy with a fine shine. Once achieved, you have every right to feel incredibly proud of yourself! Lift the pan off the heat and leave at room-temperature, whisking occasionally.

Now for your salmon. Whenever you’re poaching something delicate like fish, it’s best to place a sheet of silicone or tin-foil in the pan to serve as a ‘cradle’. This means you can lift the contents straight out, without needing a fish-slice or palette-knife to ‘scoop it up’. The latter method risks breakage, which is unsightly and unnecessary. You want your sheeting to stick out a good couple of inches either side of your pan, to form two handles.

Place the pan on the hob and pour in a small glass full of white wine or vermouth. Add some water, so that you have half a centimetre’s depth. Grind in some pepper and drop in a bay-leaf. As the liquid comes to the simmer, lower in your fish, then place the lid on the pan for 3 minutes.

After this time, lift off the lid to check on progress. If it looks nearly cooked-through, tumble in your prawns and replace the lid for two minutes. Remove from the heat and let the prawns heat up in the remaining steam.

Lift your fish from the pan, using your tinfoil handles. Do this at a slight angle, so that the liquid drains back into the pan. Transfer the salmon to a pre-warmed serving-platter, either by rolling it off the foil, or lifting carefully with a fish-slice. I prefer the rolling method; you have more control.

Spoon your hollandaise liberally over the fish and garnish with fresh salad leaves, a slice of lemon and the chopped herb of your choice. I used basil because I love the stuff!

Voila – your dish is ready! Transfer to the table and dig in whilst still warm. A perfect festive dish, that’s as fine and elegant as the occasion deserves!

Be sure to keep reading for more festive recipes over the coming weeks! Check out The Low Carb Christmas for details.

Enjoy the festive season and thank you for reading,

Adam.

The Low Carb Christmas – Beautiful Low Carbohydrate Recipes to Celebrate the Festive Season!

hall

Heap on more wood! the wind is chill;
But let it whistle as it will,
We’ll keep our Christmas merry still.
Each age has deem’d the new-born year
The fittest time for festal cheer:

Christmas is truly a time of unrivalled joy. As the days count down, the home is slowly transformed into a place of magic and wonder. Once familiar rooms suddenly spring to life, as garlands of bright green holly & ivy are brought in to ‘deck the halls’ with festive cheer. The delicate glass-baubles, hung so lovingly on the Christmas Tree; softly reflect the glow of a roaring fire and the light of a myriad dancing candle-flames.

As presents are wrapped and cards written; the kitchen too makes ready, and sings its own unique carol of joy. Pan lids clatter and best china is scrubbed; a busy hubub of merriment against a backdrop of fragrant spices & delicious roasting meats. For it is in the kitchen that magic occurs. The well-stocked larder seems boundless in its plenty, and mealtimes, so often rushed; become a ritual symbol of merriment and togetherness.

I absolutely love Christmas. It’s without doubt my favourite time of year. To honour this, I’ve devoted December’s recipes to a selection of festive dishes which will proudly grace the Christmas table. There’s a whole host of delicious low-carb food which is there to be enjoyed. And I hope you’ll enjoy it with me!

For the next couple of weeks, Country Walks in Ketosis offers The Low Carb Christmas. Starting first of all with a delicious take on the classic Christmas dinner.

I hope your run-up to Christmas is a happy one.

Thank you for reading and bon ap!

Adam.

xmas