Traditional English Faggots. But Now Low Carb!

faggots

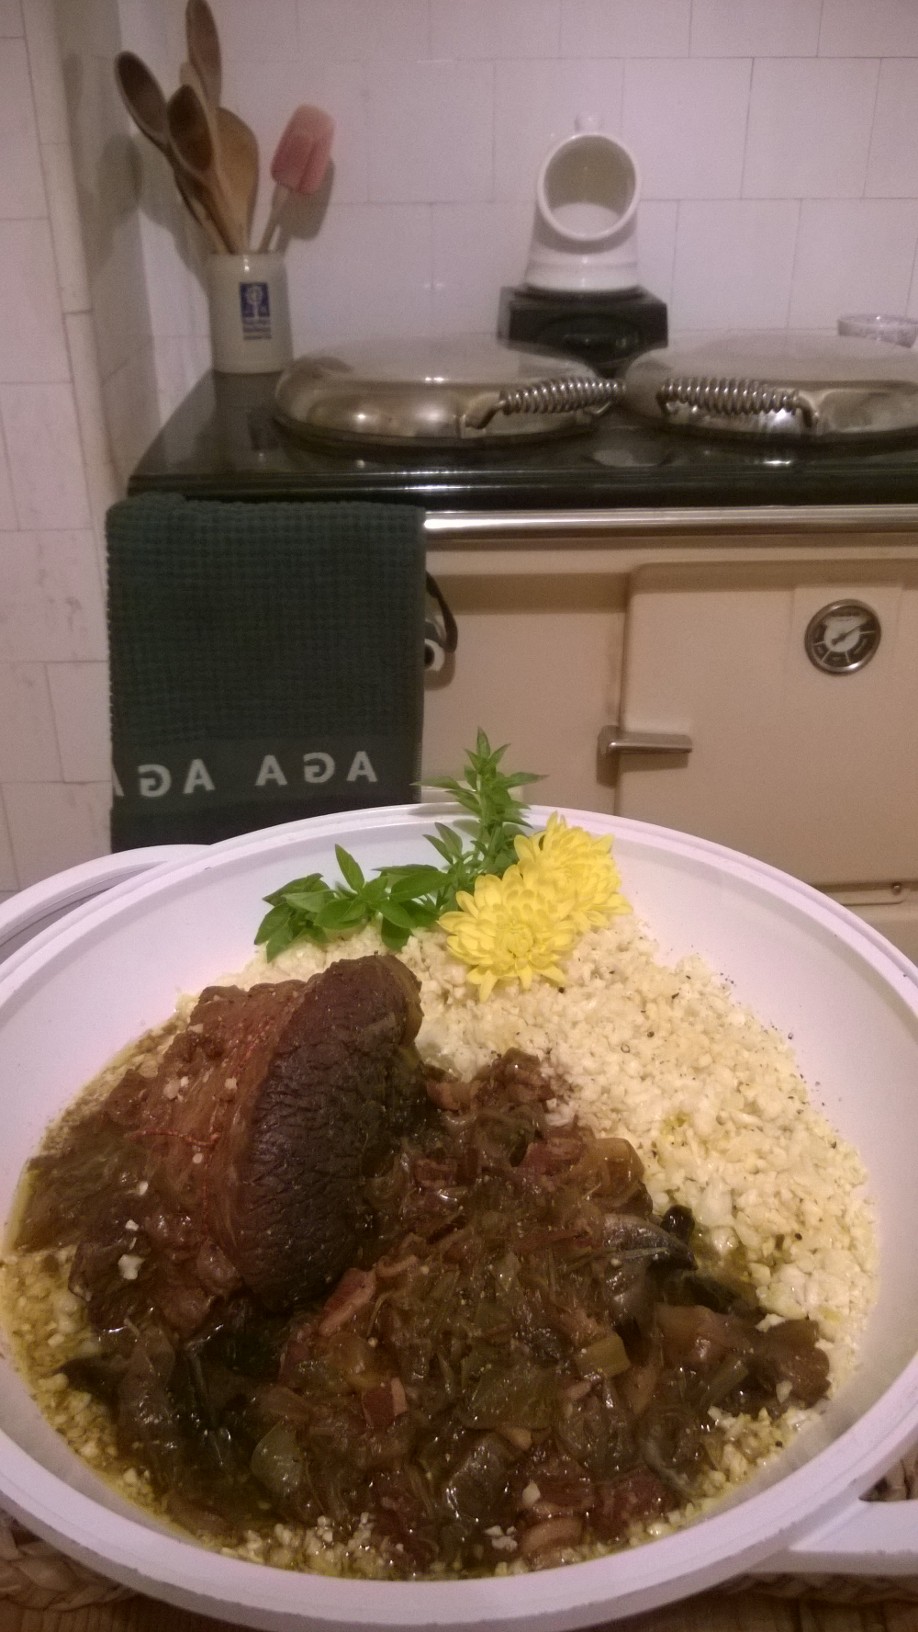
Nothing evokes more nostalgic memories of childhood than a good faggot. The nation’s firm favourite will always be the unbeatable “Mr Brain’s” [pictured below]; but alas they’re a little carb-heavy for us keto-fans; so I’ve done a paleo-friendly version which was an unmitigated success on every level!

mr brains

Traditionally, faggots are made predominantly with pork. But I split these 50/50 pork and beef mince, to add succulence and richness. Where breadcrumbs and rusk normally form the binding; ground almonds, flaxseed and coconut-flour do the job every bit as well; making these sufficiently low in carbohydrate for diabetics, paleo-followers and those on a ketogenic plan.

Some people can be a little be wary of things like liver. Feel free to leave it out; but it really adds to the richness and depth of flavour. So up to you; but I firmly recommend it!

Into a large mixing bowl, add 500g of pork mince and 500g of beef mince. This quantity will make enough for 4 people, so halve the mixture if you’re feeding fewer than that. Pour in one cup of ground almonds, 2/3 of a cup of millet/flaxseed, then half a cup of coconut flour. In a food-processor, pulse a large onion, and add to the bowl; then two pork-livers until you get a semi-smooth liquid, which would happily pride the set of a Nightmare on Elmstreet [I’m showing my age here]. With a spatula, ease this into the mix; then sprinkle in a tablespoon of dried sage, another of dried oregano, than a generous grind of salt and pepper. Now beat one large egg, and add to the rest.

To form the meatballs, I tend to don a pair of disposable kitchen-gloves. If you’re feeling sustainable however, or quite simply have a thing for squishy meat-mixtures between your fingers; then go au naturel! Mix the ingredient thoroughly, until well combined; then shape into roughly the size of a hockey ball [think halfway between a tennis-ball and a croquet-ball], placing onto a large plate as you go.

In a solid sauté pan, heat a glug of sunflower or rapeseed oil [something with a high burning point, so your kitchen doesn’t fill with smoke], then add the faggots to the pan a couple at a time, sealing each one on a minimum of 2 to 3 sides. The whole thing doesn’t have to be browned, but they need to maintain their shape; hence the minimum. Once cooked, transfer the meatballs to a large deep-sided baking-tray; then into the oven they go for half an hour to 40 minutes, whilst you get on with the sauce.

In the same pan that you sautéed the faggots, lightly cook a large sliced onion and a red pepper or two. You can add any vegetables you like, such as mushrooms; I tend to use what I have knocking around or needs using up. Then crush in 3 cloves of garlic and deglaze the pan with a generous glug of red wine.

Crumble in a couple of beef stock-cubes, followed by two cans of chopped tinned tomatoes. Round off the taste with seasoning and a teaspoon each of the same herbs as above. Simmer for half an hour until the sauce is thick and glossy.

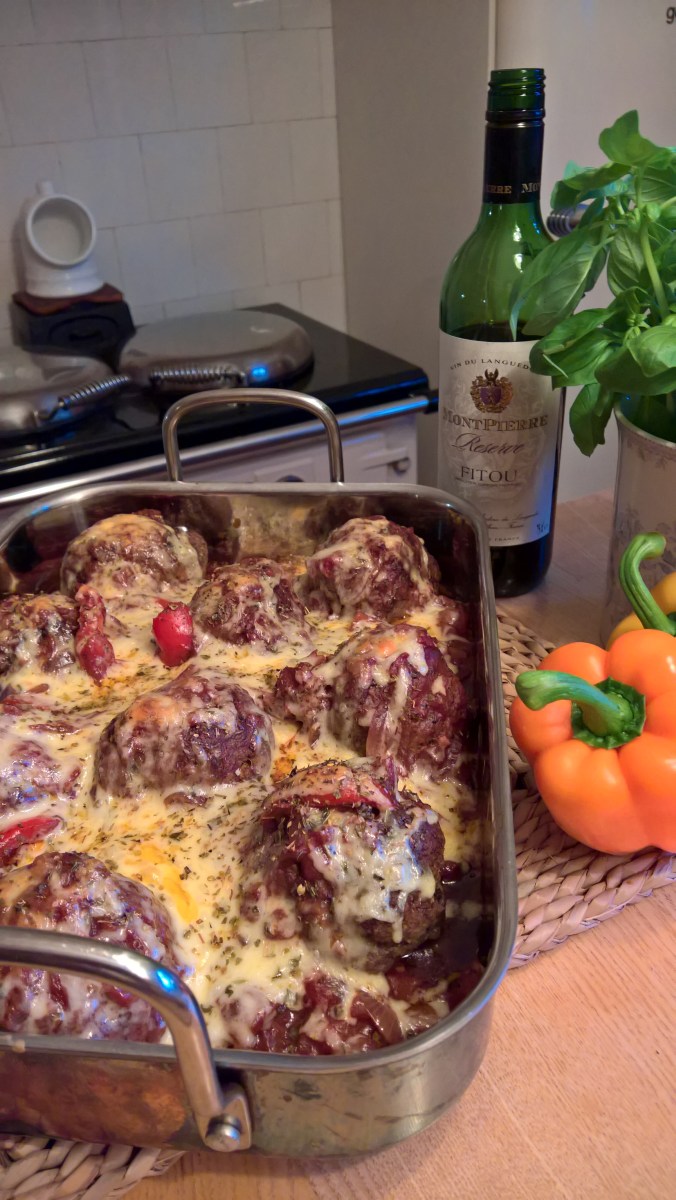
Once the sauce is ready, take the faggots out of the oven, and spoon over the sauce, topping each one nicely. Then grate a good whack of cheese, and sprinkle atop the lot, with flagrant disregard for traditional [miserable] low-fat dieters. Back into the oven they go for 20 minutes, until the cheese is unctuously melting and just starting to turn golden brown.

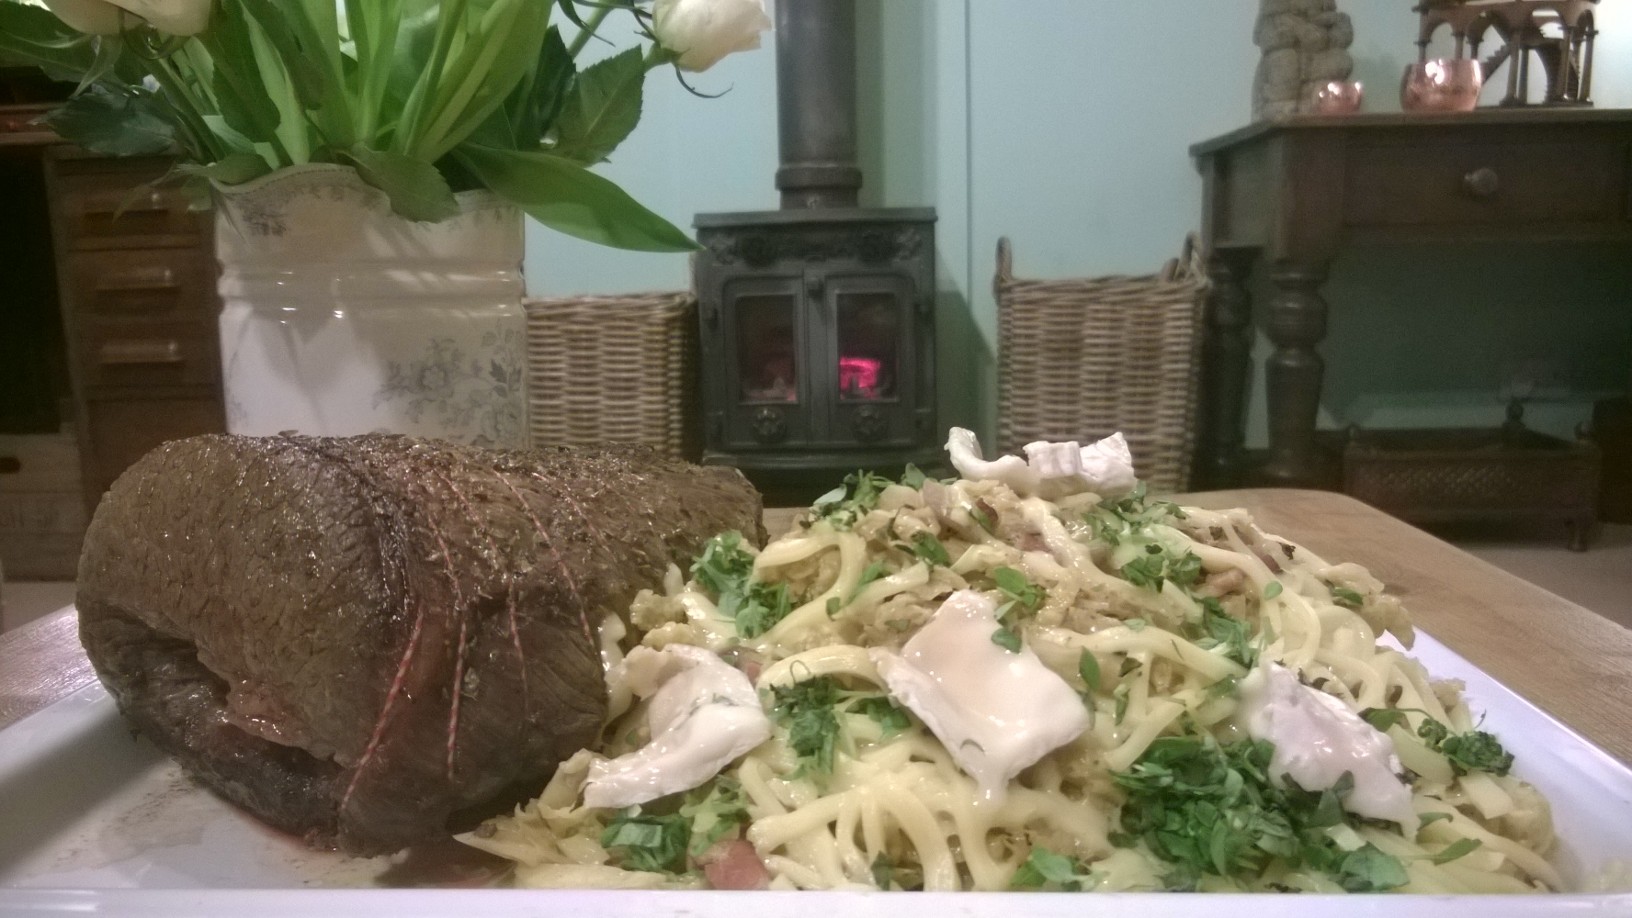
Serve the faggots and sauce with the vegetable of your choice. Celeriac mash would go down a treat; but we opted for simple buttered peas. You can’t beat a classic!

Thanks for reading and bon ap!

Adam.

Advertisement

Mouthwatering Vietnamese meatballs – a delicious low-carb bowl of delight!

Vietnamese Meatballs
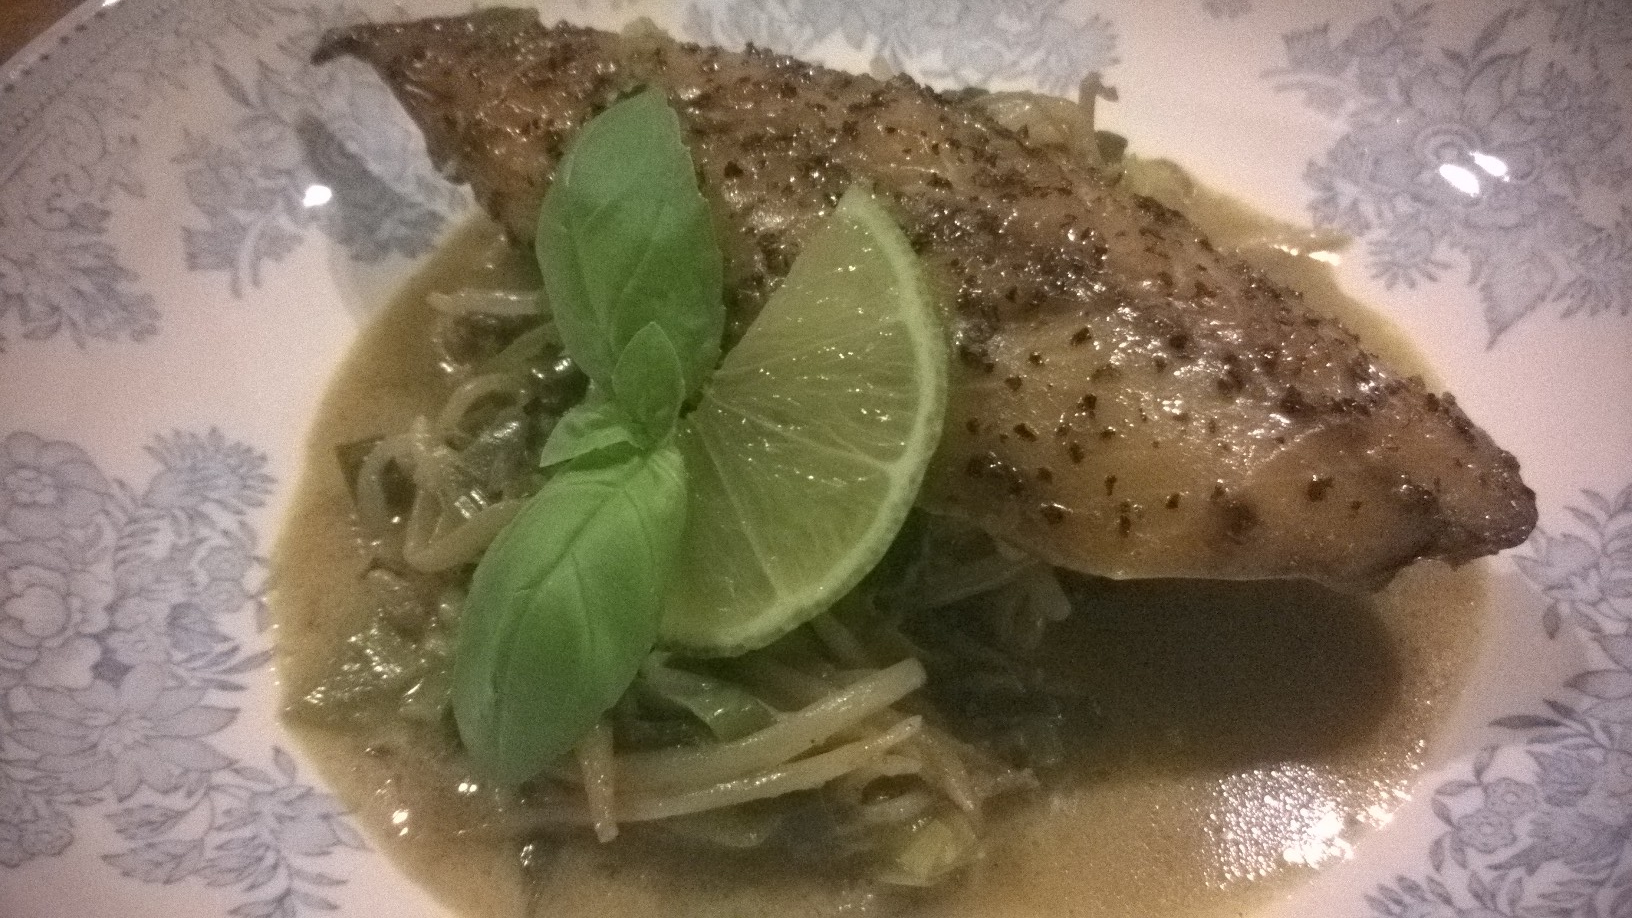
All things considered; this recipe is a winner on every level! I’m admittedly not good at oriental cuisine. My comfort zone is far more the long slow-cooked dishes of the classic European repertoire; which languish leisurely in the oven, whilst the cook enjoys the odd glass of wine or two…

So I was really pleased with the results of this one. It was surprisingly quick and fuss free. I also tend to think that oriental cuisine requires a thousand and one exotic ingredients, which I fear I’ll have to go to specialist shops for; but beyond fish sauce; this one is store-cupboard delight!

As with all dishes on this blog, the aim is low carb. Emphasis on the low. Traditionally this recipe would be cooked with noodles. Feel free to use any of the low carb noodle brands if you wish [konjac base – these are practically carbohydrate free and are a real larder staple]; but here I simply piled in the green vegetables to give it a real fresh and natural feel. The ‘naturalness’ is heightened by the use of xylitol sweetener. You could use a synthetic powdered sweetener in its place; but I prefer to keep things pure and clean; that’s the joy of home-cooking… control over what you’re eating…!

Because of the low carb levels, this dish is perfect for diabetics, people on a ketogenic or paleo diet; or just simply for those who wish to beat the bloat of flour, gluten and all that goes with them! Whatever your preference, I thoroughly recommend you give this a try. You won’t be disappointed.

Start by peeling a piece of ginger the size and a half of your thumb. You have a number of options now – grate, finely chop on a board; or use the high tech solution of a mini food-chopper. I opted for this as it’s a weeknight and I’m feeling the need for a labour-saver! Finely blitz the ginger and place in a large pan. Then chop a good whack of chilli. This very much depends on how hot you like things. I used about 15 finger chillies. But adjust to your own taste. Place half of this into the pan with the ginger, and the other half into a large mixing bowl.

Into the pan, measure out a tablespoon of fish sauce, then a generous teaspoon of xylitol or other sweetener. Grind in black pepper, then pour on a litre and a half of hot chicken stock. I boiled the kettle and dissolved in stock-cubes. Bring the mix to the boil, then reduce to a simmer and let things lazily bubble away for 15 minutes or so, whilst you prepare the meatballs.

Into the same food-processor, finely chop 3 cloves of garlic and a handful of coriander [I use the stalks, then save the leaves for that all important final flourish]. Add this to the bowl with the chilli, then pour in another tablespoon of fish sauce. Massage in 500g of minced pork, and give the whole thing a good mix. Once well and truly incorporated, form into balls, somewhere between a gold ball and a cherry tomato.

By now, your stock-base should be beautifully rich and aromatic. Plop the meatballs into the mix, and simmer for around 5 minutes whilst you prepare the vegetables. I also added whole baby button mushrooms at this point, but that was simply because they needed using up. So add or omit to your preference.

Shred a Chinese leaf cabbage into thin slices. Picture coleslaw for size. [If you have chickens, save them the stalk – they LOVE IT!]. Add the cabbage to the pan, followed by a couple of handfuls of beansprouts. You can add mangetout if you fancy; spinach, or any other low carb green vegetable. If you’re feeling extravagant, throw in some prawns or mussels for pizzazz. If using noodles, add these now.

Place a lid on the pan and simmer for circa 5 minutes until the vegetables have cooked to preference. Just prior to serving, stir in a generous handful of coriander, and ladle out into deep, comfort-foody bowls. Garnish with a final dash of coriander, then slurp up to your heart’s content; rewarded for your hard work and expertise…!

Thanks for reading and bon ap!

Adam.

Whiskey & Ginger ‘Chops’ with Stir-Fried Vegetables – put a little low carb ‘zing’ into January!

chops
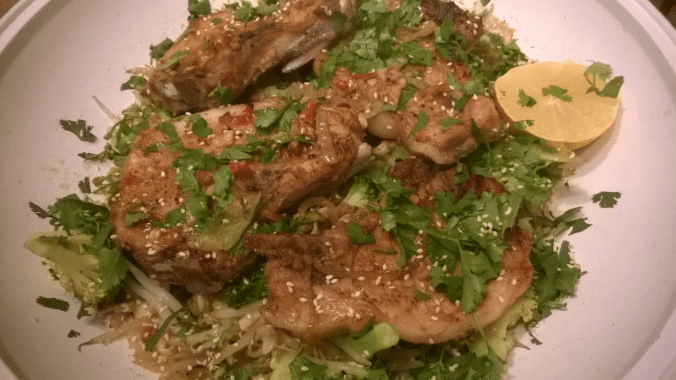
I’m often heard to say that ‘fusion food’ only leads to confusion… for the palette anyway; but this in no ways means that East & West can’t sit comfortably together on the kitchen bench, sharing the warmth of the hearth…. Well in this recipe; they not only sit, but share a generous glass of good honest ‘Scotch’ together. Confusion only kicks in therefore if they down too much of the stuff! So be sure to mark the bottle.

There’s something divinely aromatic and elegant about the pairing of whiskey and ginger. I’m an ‘islands’ man myself; thereby not smoked with wood as per the mainland variants (why? Islands don’t have many trees). There’s a heady wild ‘peatiness’ to the whiskey of the Scottish islands; far preferable in my own mind; and a taste that goes so well with other such equally poised flavours; in this case, fresh zingy ginger root and fiery scotch bonnet chilli.

Feel free to vary the green vegetables as much as you like. I chose broccoli and beansprouts because they cook quickly, which is always the essence of a good stir fry. Chinese leaf cabbage would equally be a delight; as would courgettes (zucchini), green peppers or cauliflower.

As with all recipes on this blog; all ingredients are low in carbohydrate and therefore suitable for a ketogenic- / paleo-  diet, plus diabetics type one and two. My other half is type one, and sticking to this diet there’s no insulin calculation – the same quantities every day with no unpleasant highs and lows. Easy if you know how! But equally, if you simply want to cut the bloat of a carb rich diet, then give this dish a try. You won’t regret it!

Some people are marinaters, others not. Undeniably marinating enhances the flavours, but after a long day at work, we sometimes don’t have the luxury. So marinade if you can; if not don’t spare it another thought. I’m the last to judge!

If marinating your pork chops, peel a good thumb of ginger root and chop roughly with a sturdy knife or cleaver. Do the same with x3 cloves of garlic, followed by a scotch bonnet chilli or two. If you like things a little cooler, use jalapeños; if you crave the heat, add more plus seeds as you see fit. Chop together in one big pile until everything is evenly sized.

Place your pork chops (I used x4) into an oven dish and sprinkle half of your mix over the top. Follow this with a generous sprinkle of paprika, salt pepper and a large glug of scotch whiskey. Rub in with your hands, then leave to sit for 20 minutes to an hour, whilst the flavours develop. If you’re pressed for time, simply put the oven dish straight into a preheated medium oven, circa 170 – 180°c for 20-25 minutes until the pork is caramelised and browning at the edges.

Meanwhile, finely slice an onion and de-floret a large head of broccoli. Be sure to keep the stalk and finely slice that alongside the onion – it lends the perfect cheat’s intimation of bamboo shoots!

When your pork is 7 or so minutes from completion, place a solid wok onto a high heat. Glug in some sesame oil with a little sunflower oil to mete it out… Then pile in your chopped onion, broccoli stalk and the remaining half or your ‘galicky-ginger-chilli’ mix. Stir fry for a minute or so, then tumble in your chopped broccoli florets. Follow these two minutes later with your beansprouts. Now take the pork out of the oven and pour oven any pan juices surrounding the meat – it should smell and look delicious!

Cook the vegetables in the pan juices for a further minute, then spoon your chops on top. Finish the whole thing with a flourish of toasted sesame seeds and and a whirl of chopped coriander. Divine decadence in the extreme!

Thanks for reading and bon ap!

Adam.

Meltingly Tender Pot Roasted Beef – Traditional Home-Cooking, Without the Carbs!

WP_20151020_20_19_18_Pro

If ever a dish had the power to warm both heart and soul to the core; this is it!

Food can mean so much more than nutrition alone. When you cook up ‘something special’, which you mightn’t normally cook; your actions can relay a real sense of occasion. You’re conferring a special treat, and with it, you’re communicating a range of sentiments: comfort, warmth, love & nurture. Nothing says “I care” quite as much as dedicating your time to producing your level best! A poet does it with words; the cook does it with dinner!

But to achieve these wonderful results, it needn’t follow that the process itself prove complicated or difficult; nor that you’ll be slaving for hours, then end up with a huge mountain of washing up! This recipe is actually incredibly simple, but the finished dish is anything but… I strongly urge you to give this a go – you won’t be disappointed!

Enough of results; let’s focus on contents…! Do you see rice in the picture? Am I advocating carbohydrate on a low carb blog? Heaven forbid! What I’ve served this with is cauliflower rice; a true godsend on any low carb or paleo plan. I hyperlink the recipe to this as follows: cauliflower rice recipe.

And the beef itself? The brisket is slow cooked over hours, which means that excess liquid is staved off and the sauce requires no thickening-agent whatsoever. Indeed, all ingredients in this dish are suitable for both classes of diabetics, or anyone following a ketogenic / low-carb diet or paleo-regime. Beyond this, it’s suitable for all, so cook it for some ‘carb-eating friends’; they’ll never know!

So to begin, bring you beef-brisket to room temperature and season well.

Brisket is an ideal cut for slow cooking. Why? Cows don’t have collar-bones. This means that the entire weight of their head and neck is borne up by muscle. By necessity, that muscle must be pretty strong; so it contains high amounts of collagen, a structural protein which requires long slow cooking to break down and tenderise before it’s ready.

Pan fry brisket at your peril – you’ll end up with tough, fibrous strips which are truly unpalatable in every which way. But with slow-cooking, the collagen gelatinizes which naturally thickens the sauce (as per oxtail) and delivers delicious tender meat which simply melts under the fork – you’ll scarce need a knife!

Once the meat is room-temperature and the oven is good and hot; place the brisket into a heavy-based casserole pan, then straight into the oven for circa 20 minutes until the joint is sealed and deliciously brown on all sides.

Whilst this is looking after itself, quarter a couple of onions, then halve each segment into eighths. Peel a couple of cloves of garlic and roughly chop, followed by a green pepper, a leek, some celery and any odds & ends you may wish to use up. To be honest with you, as long as the onions and garlic are there, you can pretty much use any low-carb vegetable you wish. Try a dice of celeriac or courgettes – delicious!

Once the meat has browned, remove it from the oven and place the pan onto the hob. Tumble in your vegetables, followed by a couple of bay-leaves and a sprig or two of parsley if you have it. Return to the oven for 5 minutes, until the vegetables are good and hot, then bring out the pan once more and deglaze with a whoosh of red wine or port.

Why do I keep taking the pan back out of the oven, then in again, like a saucepan-hokey-cokey? Who wants to clean the hob unnecessarily…? Keep it clean as you go, then afterwards you’ll feel all the more smug as you get to relax all the sooner…

When the alcohol has reduced into a delicious cloud of steam, follow it by two cupful’s of water, a couple of beef stock-cubes and a generous teaspoon of Dijon mustard. You can of course use fresh beef-stock if you wish; if you do, then omit the stock-cubes and water. With regards volume, I state ‘two cups’, but depth is the real key here. You want the joint when on its side to be waist deep in liquid; no more, no less. Once achieved, allow the sauce to come to the simmer on the hob, then put the lid firmly onto the pan and into a slow oven it goes for circa 4-6 hours until it is achingly tender.

Why is the timescale so vague? A dish like this is pretty forgiving. As long as the oven is low enough and there’s sufficient water, it could easily go in overnight and not suffer – in actual fact, it’d be all the more delicious! What does a low oven mean? Think gas mark 1-2, circa 140-150°c. I have a cast-iron range cooker, so into the simmering oven it goes and I needn’t even peek until dinner time!

Once the time has elapsed, remove from the oven and take the lid off the pan. There should still be at least a cm of liquid and the most delicious, rich, savoury smell should serve as your reward! Check the sauce for seasoning and adjust if required. Place the lid back on the pan, then leave to one side to ‘rest’ whilst you cook the cauliflower rice.

Why do people always tell you to leave meat to rest? My own interpretation of this is somewhat grizzly and gruesome. If you’re of a nervous disposition, then please jump straight to the next paragraph, stopping reading from this point onwards…. Look down at your forearm, then tense your arm-muscles. Imagine cutting a knife through that; it would literally tear in the most rough and brutal way and you’d need a saw to get through it! With heat (like exercise), the muscles and tendons tighten, much like when you’re tensing your forearm. It would be a nightmare to cut through and would never achieve a clean slice. Now un-tense your arm. It’s clear to see how the muscles relax and lose their stress. Relaxed muscle (ergo meat) will cut cleanly, resulting in less moisture loss in the form of meat-juices, and a melting tender consistency. A good sharp kitchen knife will do the job – no need for a saw here (the same goes for a steak knife). As I say; that’s my own version of events – it’s always been the easiest way for me to envisage the process, serving to explain why meat should always be left to rest before carving. Take it or leave it… it works for me!

Gruesome bit over – the fragile amongst us can now resume. Cook your cauliflower rice as per the recipe under the hyperlink (cauliflower rice). Then simply lift the meat out of the pan and place atop the still al dente rice, spooning the beautifully reduced vegetables and sauce all around.

For that all important final professional flourish, garnish with chopped herbs: basil, parsley or oregano. Then simply carve the beef and dig in! The carving can almost be done with a wooden spoon.

Despite my long-winded, tiresome explanations, this recipe couldn’t be simpler. But I’m sure you’ll agree, it tastes anything but! So give this a go and toast the onset of winter with a bowl of pure comfort!

Thanks for reading and bon ap!

A.

Seared Leg of Lamb With Warm Asparagus, Sprouting Broccoli & Feta Salad – Divinely Different Low Carb Cookery!

WP_20151016_21_30_21_Pro

If I were asked to recommend one low carb recipe to an absolute ‘low carb beginner’, I think this might be it! Few dishes can be so simple to prepare, yet taste so rich and amazing as this!

Lamb will always be a winner in the Low Carb Kitchen. Once in the oven, the succulent smell of roasting meat fills the room, and is truly mouth-watering! Plus, it’s one of those meats that can simply be left to do its own thing.

I’m often quoted to state “don’t fuss over your food; no-one likes to be mothered, and the same goes for your dinner!”. Well a leg of lamb is a refreshingly independent beast, requiring no fussing or mothering whatsoever! This makes it the perfect dish to prepare on a lazy Sunday or when you have people coming to dinner and want something that can simply sit in the oven whilst you relax and get on with the rigour of entertaining!

There are also few dishes which look quite so impressive as a leg of lamb. It has instant ‘plate theatre’, which combined with the luxury of rich asparagus and fluffy white feta, makes for a true treat in every which way!

Then add to this the low levels of carbohydrate, and you have a dish which is perfect for ketogenic dieters, diabetics or anyone who simply wishes to beat the bloat of a high-carb lifestyle. You feel great and get to eat food like this. Who could ask for more…?

So, how to go about cooking this plate of purest wonder? Start by preparing your vinaigrette ahead of time. See the following hyperlink for the standalone recipe: traditional French vinaigrette recipe.

Vinaigrette is something I always have in the cupboard. It keeps for yonks and provides the perfect finish to so many salads and vegetables. Try it with cooked celeriac and parmesan, or roasted broccoli and pine nuts – divine!

Anyway, I digress… Place your lamb onto a sturdy baking-tray or roasting dish. Season well on all sides, then into a very hot oven it goes for 20 minutes, until seared and golden on all sides. Temperature wise, think 220°c / gas mark 7, or top of the aga roasting oven.

The smell coming from the oven will be sublime at this point. Now simply turn down the temperature to approximately 180°c / gas mark 4, and roast for an hour and a half, until the meat comes away from the bone. Once roasted to perfection, remove from the oven and leave covered in tinfoil to rest for 20 minutes.

Whilst the meat is ‘relaxing’, bring a pan of water up to a rapid boil for your vegetables. Snap the tough stalks off the asparagus at their natural breaking point, and trim the ends off the stalk-broccoli. Plunge these into the water for two minutes, then strain off the liquid. Return in the same pan to the hob, this time glugging over a generous whack of best quality olive oil. When the edges begin to char and blacken in an appealing way, sprinkle on some sea salt and season well with crushed black pepper.

Dice your feta cheese into 1cm chunks, then add this to the vegetables. I also added a few chopped cherry tomatoes for colour, but this is your choice entirely! Now spoon a good couple of tablespoons of vinaigrette over the top and stir through thoroughly.

To finish the dish, tear over a handful of fresh coriander leaves. Their peppery sharpness provides a wonderful counterpoint to the richness of the lamb and sour tanginess of the feta.

Then simply carve the meat into luxurious chunks, which literally fall from the bone when cut. Spoon out the vegetables and dig in whilst the lot is still piping hot.

I’ll vouch there won’t be a scrap left on the plate!

Thanks for reading and bon ap!

Adam.

Celeriac Chips – Who Needs Potato? The Low Carb Food Revolution Continues!

Celeriac Chips

In a contest between low carb v bloating starch & sugar; the ketogenic approach seems to be boasting “anything you can do, I can do better!” And that’s certainly the case with this recipe – celeriac chips!

When you first start a low carb or paleo regime, a lot of old favourites suddenly feel out of bounds. Without a little learning, any attempts to recreate them can often seem half-hearted, presenting a poor substitute for the dish you’re trying to copy.

With a little experience however, the food world is your oyster. And one thing I’ve genuinely missed…? Chips! Not that we ate them much anyway, but it’s always been more the feeling of depriving yourself that’s hard – the sense of ‘I can’t have this’ which makes you want it all the more!

Well celeriac chips are in no way a poor relative of their potato cousins. In all honesty, they taste far better and have a warm nutty flavour which is truly irresistible! And at circa 5g net carbs per 100g, they’ll hardly break the carb bank, leaving ketogenic dieters, paleo fans and both types of diabetics free to tuck in with gusto!

So without further ado, the next life-changing low-carb experience awaits. And it couldn’t be easier!

Heat sunflower or vegetable oil in a frier or on the hob until circa 130°c. Whilst the oil is heating, peel your celeriac root with a sturdy peeler, then cut the ball in half vertically. Follow this by cutting each half into 1cm thick slices, then cut each slice in turn into 1cm wide batons.

Once the chips are cut, lower them into the hot oil and leave to cheerily bubble for 8-10 minutes until cooked through, but not brown. When I say cooked through, image ‘bite-able’!

When ready, lift the chips out of the oil and place on greaseproof paper or kitchen towel. Now turn up the temperature of the oil to circa 180-190°c ergo good and hot! Once the oil has reached the desired temperature, lower the chips back in and fry for a further 5 minutes until they’re golden brown with a slight crisp around the edges.

Lift out and place back onto kitchen towel again to drain for a couple of minutes. Dredge with a generous sprinkle of sea-salt and serve up to the ravenous horde. I’ll wager you try at least one before they reach the table!

A good low carb dip or sauce is garlic mayonnaise (aioli). What more can you want? So forget the humble potato – there’s far finer things on the horizon. When it comes to low carb, the grass is certainly greener. But don’t just take my word for it, try this recipe and give it a go yourself. You won’t regret it!

Thanks for reading and bon ap!

Adam.

The Low Carb Alternative to Mashed Potato: Cheesy Marrow Mash – Stunningly Simple Low Carb ‘Sides’

WP_20150923_004

The humble marrow feels very much the ugly duckling of the gourd family.  Sometimes its  sheer cumbersome, hulking bulk is enough to put you straight off – it feels as if you’ll be ploughing through the stuff for days, and most cooking methods don’t bring out its best.

But marrow is very much a keto-go-go vegetable! At circa 1.9g net carbs per 100g, it’s super low and is therefore perfect for diabetics, ketogenic dieters or anyone simply wishing to beat the bloat! And add to this, it’s abundant and hugely economical at this time of year – no other vegetable packs as much punch to the pound!

I always think that the best way to prepare marrow is mashed. It has the luxuriant feel of mashed potato, but none of the starch!

Start by cutting your marrow into large chunks (skin on). Remove the seeds with a spoon and place the portions onto a baking tray and drizzle with olive oil. Season well and into a hot oven they go for 40 minutes to an hour, until the flesh is soft and starting to brown at the edges.

Remove from the oven and scrape the flesh into a casserole dish with a soup-spoon. I find this is best done by picking up each piece in turn and holding it with an oven glove. The flesh should come out incredibly easily, leaving the tough skins behind which can simply be discarded.

Add a knob of salted butter to the pan, followed by a generous handful of grated cheese. I also add a good dollop of English mustard for background depth, but that’s entirely up to you.

Check the seasoning and add more if required, then mash out the lumps with a potato masher or fork. Back into the oven it goes for circa 20 minutes, or until the surface is golden brown and bubbly.

Hey presto – our ugly ducking’s a swan!

Thanks for reading and bon ap!

Adam.

Herby Cod Mornay with Fresh Garden Sorrel – Low Carb Cooking at its Best!

cod mornay sorrel

As Summer fades into Autumn, we seem to sit on the fence when it comes to food.

The heart and stomach are divided – half yearns for the substantial filling fare of October’s darkening nights; whilst the other half seems to mourn the carefree, light & delicate taste of Summer, as it slowly slips away for another year without a trace.

The kitchen garden seems to feel the same way. It clings on desperately to the last vestiges of warmth and sunlight, fighting to retain the fruits of its harvest until the last possible moment.

One such taste of Summer is sorrel. This wonderful leafy herb has a sharp, lemony taste, which reminds me in crispness of a sour green apple. It could never be accused of robustness and tends to wilt soon after picking.

Thankfully the greenhouse has coddled what’s left of mine; sufficient to serve up one last elegy to Spring. So let’s drink to that whilst we can!

The delicate tang of this fragile flavour responds well to richness. It serves as a counterpoint to deeper taste-profiles; lifting them and lightening the mood, like a laugh in the library.

In this instance, I’ve paired it with the luxuriousness of cream cheese and parmesan – all superb low carb ingredients, which makes this a great dish to serve up to diabetics, ketogenic-dieters or those following a paleo regime.

Serve it as a light lunch, starter or main meal bulked up with broccoli or cauliflower. If you can’t get hold of sorrel, fresh spinach and a good squeeze of lemon juice will do the job admirably. We aim for flexibility in the Low Carb Kitchen! So give this a try and let me know how you get on.

This dish couldn’t be easier to prepare. Allocate one third of a 200g tub of full fat cream cheese per portion.

Place your cod pieces (no pun) onto a baking tray and drizzle with olive oil. Season well and place into a hot oven for circa 15 minutes until the fish is cooked through.

Meanwhile, spoon your cream cheese into a heavy-based saucepan. Place this on a low heat and pour in a dash of double cream and a tablespoonful of water per portion. Season and stir well until all the ingredients are combined.

At this point sprinkle in a generous handful of grated parmesan cheese, squeeze in some lemon juice and add half your roughly chopped sorrel (at least a cupful).

Bring the sauce to a light simmer, then once the fish is ready, plate it up and spoon the sauce all over the top, erring naturally on the generous! Think ‘lashings’…

Finish will a flourish of the remaining chopped sorrel and some shavings of parmesan to garnish. One last touch of lemon or lime juice will cement the lightness of Summer, then simply tuck in and enjoy!

Low carb cooking doesn’t get better than this!

Thanks for reading and bon ap!

Adam.

Cavolo Nero – The Dark Highwayman of the Vegetable Beds! Deliciously Different Low Carb Sides

cavolo

As Autumn slowly creeps in, we start to welcome back old friends to the kitchen and garden. One such returning hero, is Cavolo Nero; the dark highwayman of the vegetable beds!

Mysterious and enigmatic, the inky black leaves of this striking plant grow in strident clumps, rather than forming a cohesive ‘head’ like cabbage or other leafy greens. This lends it an almost cavalier ‘gothic’ appearance, which is as much of a pleasure to gardener as it is to low-carb diner alike!

But above and beyond its rather edgy & peculiar looks; this rugged Tuscan cousin of kale is absolutely delicious! And variety of side orders is particularly welcome on a low carb / ketogenic diet, where the risk of ‘vegetable monotony & repetition’ lurks around every corner!

Use it on its own, in stews, baked, sautéed, fried, steamed or with roasted vegetables. Its astounding utility is equally as striking as its good looks! And like all ingredients on this blog, Cavolo Nero is particularly low in carbohydrate (just 1.8g net carbs per 100g); so it’s perfect for ketogenic diets, diabetics or those following a paleo-plan. I’ve even heard it described as a super food; and if I’m honest, in this instance I can’t really disagree!

To cook this rugged brute, start by trimming off the tough white stalk at the base of the leaf. I tend to cut a ‘v’ into the stem, preserving as much of the green leaf as possible. Then simply chop the leaves into inch lengths, give them a good rinse in cold water, then strain into a sieve or colander.

Whilst the Cavolo Nero is draining, thinly slice an onion and soften on the hob in a generous spoonful of butter until it turns translucent. As the onion softens, chop your broccoli into chunks and add to the pan, stalk first as this is the longest part to cook.

Once the broccoli is in, add a couple of cloves of chopped garlic and crumble over a chicken stock cube or two. You could also use a cupful of fresh chicken stock if you’re glamorous enough to have this to hand.

Season the mix well, then pile in your Cavolo Nero and follow it with a god handful of frozen petits pois (overpriced peas). If you’re using fresh stock, there’s no need to add any liquid; if you used stock-cubes, pour on a half cupful of water to prevent the contents from sticking.

Stir the lot, then place a lid firmly on the pan. Cook for between 5 and 10 minutes on a low heat, until the Cavolo Nero has wilted down but still retains its bite.

Whilst the pan is on the hob, grate a good whack of parmesan cheese and sprinkle this over the vegetables once cooked. Fold the cheese into the vegetables, garnish with freshly chopped basil or oregano then rush to the table whilst the lot is still piping hot. Serve alongside meat, fish or use as a base to eggs florentine.

One word will sum up the lot… delicious!

Thanks for reading and bon ap!

Adam.

Cumberland Sausages with Bacon, Peas and Ham – delicious ‘Great British’ low carb meal ideas!

sausages

Quite often, the simplest meals are the best! And few things can beat this delicious twist on a classic; either in terms of taste or speed! Since the 18th century; peas and ham have featured as a trusted combination in the English culinary repertoire to stupendous effect. Pea and ham soup has been a firm favourite for generations, as has the more interestingly named Pea & Ham Pudding (savoury). In this recipe however, I aim to ‘de-clutter’ things; providing all the rich taste and flavour of the original in a way that’s fast and fuss-free to prepare!

Like all recipes on this blog, there’s virtually no carbohydrate here. This makes it great for diabetics or those on a ketogenic diet. Also, because there’s no gluten, coeliacs or those with an intolerance to wheat can also dig straight in! If you’re a strict ‘paleo-protagonist’, you may wish to pass on the parmesan cheese, but I leave that up to personal preference to decide.

Before we start, just a quick word on frozen peas. Be sure to read the back-of-pack to check the carbohydrate content, as this can vary hugely. I used petits pois which come in far lower than standard ‘mature’ peas (circa 3g net carbs per 100g v 8g); but the net carb rule of thumb will guide you to the optimum choice (hyperlink as follows: net carb calculation).

Start by placing your sausages onto a baking-tray. Drizzle on a little oil to prevent them from sticking and season well. Into a hot oven they go for circa 25 minutes until succulent and sizzlingly golden.

In the meantime, dice your bacon and place this into a heavy-based pan on the hob. Seal on a medium heat with a little butter until the bacon starts to brown. At this point, add in one large finely sliced onion.

Lower the heat slightly and soften the onion for circa five minutes until it starts to turn translucent. Once you’re there, crush in two cloves of garlic and season well.

Two minutes after adding the garlic, it’s time to crank up the heat once more. Add a large bowlful of frozen peas and stir well to heat through. You now have two choices – you can either de-glaze the pan with a generous glug of dry stout sherry followed a minute later with chicken stock; or you can be abstemious and opt for just the stock. I don’t have to tell you which method I prefer, but I certainly shan’t judge you if you plump for the prohibition version! Either way, you want the liquid to just cover the peas. And with regards the stock – boiling water and stock-cubes will do the job admirably! Whilst absolutely delicious, home-made stock is difficult to fit into the hustle and bustle of everyday life. If you have this luxury however, I salute you!

Once the liquid has gone in, finely chop a couple of slices of smoked ham for background ‘warmth’ and add these to the pan. Reduce the contents on a medium heat for 15 minutes until the water is all but gone. Then stir through a large handful of grated parmesan cheese and a generous knob of butter.

By this time your sausages should be browned to perfection. Remove these from the oven and place at intervals over the surface of your peas. Finish the dish with a final flourish of chopped herbs (basil, parsley, oregano or sage are a delight) and voila! Your delicious low-carb dinner is ready! And all within half an hour! (I salute that too!).

Browse this and other recipes by picture on my pinterest page: country walks in ketosis pinterest.

Thanks for reading and bon ap!

Adam.

Deliciously Different Low Carb Ideas – Hot Smoked Mackerel, Leek & Bean-Sprout Kedgeree. Fast, fuss-free & sublimely tasty!!

kedgeree

My favourite recipes are always ones which are quick and simple, yet packed with taste & flavour. Well, recipes doesn’t get any easier or more delicious than this! Hot smoked mackerel, with buttered leeks and bean-sprouts, all bolstered by a warm & aromatic hint of curry.

The inspiration for this dish comes from the classic ‘kedgeree’ dish, first made poplar in England at the Victorian breakfast-table. The traditional version also contains eggs and rice, which you could very easily include; indeed cauliflower rice (hyperlinked) would be a stunning addition, & hard-boiled eggs are ready in no time! But I chose to prepare this as a starter, so didn’t feel the need to bulk it up too much. If you include the eggs and the rice, then this would then make a brilliant stand-alone supper, dinner or luncheon-dish. So experiment away and be sure to tell me how you get on!

As with all recipes on this website; the ingredients here are very low in carbohydrate. At about 2.5g net carbs per 100g, beansprouts are a great way to get your daily intake of vitamins and minerals; plus they’re quick to cook, which can be a real blessing when time’s in short supply! Such low levels of starch, plus the fact there’s no wheat; make this dish perfect for diabetics, gluten-intolerants or those following a ketogenic-diet (like me). Fans of the paleo-regime will also be well-catered for, so I strongly recommend everyone to give this recipe a go!

Start by finely slicing a leek, including the green leaf-tops, to add colour and flavour. Sauté these in a generous spoonful of coconut-oil & butter, or just butter if you don’t have any coconut-oil to hand. Leave to soften on the heat for a few minutes, then add a couple of cupfuls of beansprouts. Sprinkle on a good teaspoon of curry-powder, followed by a crumbled chicken stock-cube. Then add half a can of full fat coconut milk and season well.

Once the coconut milk has come to the boil (circa 1-2 minutes), lay your smoked mackerel-fillets (I used pre-cooked from the supermarket) across the surface of the vegetables, then transfer the pan to a hot oven for 10 minutes, or until the fish is piping-hot and the liquid reduced by three quarters.

Take the pan out of the oven and spoon the vegetables into broad-bowls to capture the delicious coconut-curry sauce. Then simply place a mackerel fillet atop each portion, drizzle on some of the pan-juices and garnish with a final flourish of fresh herbs.

Voila! Dinner is served. Totally delicious from the first to the very last bite; so enjoy!

Browse this and other recipes by picture on my pinterest page: country walks in ketosis pinterest.

Thanks for reading and bon ap!

Adam.

Mouth-Watering Leek, Smoked Ham, Bacon and Mozzarella Gratin – low carb fast food at its best!

leeks 2

I’m not entirely sure whether someone writing a sensible ‘grown up’ food-blog like this should use words like ‘yummy’. But in this instance, I’m going to throw caution to the wind and come straight out with it… This dish is absolutely yummy! There; I’ve said it! Please don’t hold it against me; we all have or faults.

If you can bear to continue reading after that, I shall tell you that I didn’t get home from work until eight o’clock last night. As a result, I was ravenous & craving something fast, filling & easy to cook.  Well this delicious gratin is exactly that. Not only is it incredibly quick to prepare; it’s also one of those recipes that’s absolutely bursting with flavour from only a mere handful of simple ingredients. There’s also precious little washing-up; so I consider this dish to be a true winner on all fronts!

There’s something sublimely indulgent about the combination of leeks & salted butter. The vegetables go so tender as to almost melt off the fork. The leeks are then wrapped in smoky slices of cured ham & topped by a delicious layer of golden, molten mozzarella; can you understand why I describe this dish as ‘mouth-watering’?

Because there’s virtually no carbohydrate in this dish; it’s perfect for diabetics or anyone following a ketogenic-diet or paleo-plan.  The only real carb-content here is the circa 1g of net carbs found in the leeks themselves. And that certainly won’t break the cab-bank…! I’ve served the gratin with fresh green pea-shoots; but it would go equally well with any crisp green salad or even cauliflower rice (cauliflower rice recipe here).

Start by trimming the tops off your leeks, reserving them for another day’s stock or soup. Then cut the white stems into 3 inch chunks.  Sauté the leeks in butter in a heavy bottomed pan until they start to soften, circa 5 minutes. Once the leeks are tender, roughly chop a few rashers of bacon and add these to the pan.  Continue to cook on a low heat until the vegetables are golden and the bacon a crisp brown. Then remove the pan from the heat to allow to cool for five minutes, so that you don’t burn your fingers when wrapping the ham.

In a separate pan pour in a generous cupful of double cream and stir in a good tablespoonful of Dijon mustard. Place onto the hob, stirring occasionally until the cream approaches the boil. At this point, season well and mix in a handful of chopped herbs (I used basil but any fresh herb of your choice will do the job admirably!).

Cut your ham slices into lengths with approximately the same width as the leeks. Place a piece of leek on the end of each slice and roll them up like sausage-rolls. Once done, place these back into your original pan, which should still have the bacon scattered at intervals over the base. Then simply pour on your cream mixture, making sure to cover the surface as uniformly as possible.

All that remains is to cut your mozzarella into thick wedges and place these on top. Give the dish a final sprinkling of herbs then into a hot oven it goes for 15 minutes to brown up, up under the grill until the surface is bubblingly brown and delicious!

Spoon the finished dish into broad bowls and serve your salad to one side. Then dig in whilst the gratin is still piping hot!

Voila! A delicious low-carb meal ready in just under 30 minutes!

Browse this and other recipes by picture on my pinterest page: country walks in ketosis pinterest.

Thanks for reading and bon ap!

Adam.

Melt in the Mouth Mozzarella, Paprika & Jalapeño Turkey Steaks with Crunchy Buttered Mange-Tout- low carb cuisine doesn’t get much tastier or quicker than this!

WP_20150204_20_24_45_Pro (1)

Without wishing to ‘blow my own trumpet’; this dish was absolutely delicious! Melted mozzarella is undeniably a ‘food hero’; nothing beats the effect when you cut into hot mozzarella and indulgent strands of melted cheese ‘unwind’ into the air, prompting you to twirl it round your fork like spaghetti! And underneath that layer lies a bed of mouth-wateringly tender turkey-breast steaks, carrying just the right amount of heat through a sprinkling of peppery, tart jalapeños. In short – heavenly sublime!

The crowning-glory to this dish is the sheer volume of taste which can be delivered from a recipe this quick! Few meals can be this easy to prepare; so if you’re looking for a ‘low effort, maximum reward’ mid-week dish, then this must be it! Beyond the 2-3g net carbs provided by the mange-touts, there’s practically no carbohydrate here; so ketogenic-dieters, diabetics, paleo-fans and gluten-intolerants can all tuck in with glee, not concern!

Start by placing a heavy-based pan onto the hob and drizzling in a little oil with a knob of butter. Whilst this heats through, season your turkey steaks, then place into the pan once the oil is piping hot. Seal on each side for 2 minutes, or until the surface is dappled with light golden brown caramelisation.

Whilst the meat is searing, finely slice an onion, then sprinkle this inbetween the turkey-breast-steaks once turned. Soften the onion for a minute or so, before adding a large clove of crushed garlic and two roughly chopped jalapeño peppers (keeping the seeds in if you like the extra heat). Leave this to cook through on the hob for 3-5 minutes, stirring occasionally to prevent the contents from sticking to the base of the pan.

Once the heat has built up to a crescendo, pour on hot chicken-stock (or water and stock cubes), sufficient in volume to just cover the contents. The whoosh of steam is a thing of pure joy, as the pan rapidly deglazes to the heavens Be sure to lift up all the delicious caramelisation from the bottom of the pan with a sturdy wooden-spoon, as this is where all the flavour resides! Now simply leave to simmer until the liquid has reduced by thee quarters; allowing you to prepare the remaining ingredients.

Whilst the stock is bubbling away, finely chop some fresh basil and sprinkle this on top of the turkey. Open your packet of mozzarella, trying to drain off as much of the liquid as possible. If the cheese is cooked ‘wet’, then this will compromise the browning and ‘stretch’!

Slice the cheese into thin chunks, then once the liquid is barely covering the base of the pan; lay your mozzarella slices generously atop the turkey-steaks. Sprinkle the surface with a final flourish of herbs, then into a hot oven it goes for 15 minutes or until the cheese is richly golden and bubbling.

In the time that the mozzarella takes to brown, bring a shallow pan of water to the boil and steam your mange-touts with a little salt for 2-3 minutes until just tender, but still retaining their bite. Once there, strain the pan and stir through a generous knob of butter. A last minute grind of pepper and sprinkle of sea-salt will see your vegetables cooked to perfection.

All that remains is to lift the turkey out of the oven and serve it up alongside your hot buttered beans. The whole dish ready in just under 30 minutes, but I’ll wager the plates are ‘clean as a whistle’ in a fraction of the time!

Browse this and other recipes by picture on my pinterest page: country walks in ketosis pinterest.

Thanks for reading and bon ap!

Adam.

Deliciously Different Low Carb Ideas! Warm Cream-Cheese, Garlic, Avocado & Bacon Salad with Rocket & Basil – Truly Sublime!

avocado

Some recipes taste so wonderful, you’d scarcely believe that they’re ready in minutes! Equally challenging is when you’re looking for something low-carb, but crave something just that little bit different! Well this dish is a winner all round… Decadently indulgent garlic cream-cheese sauce, warmly smothered over rich avocado, topped with crisp salty bacon. Truly a recipe that has it all!

I serve it here as a starter; but because it’s so quick, it would equally make the perfect ketogenic lunch or light low-carb supper. Like all recipes here, it’s suitable for diabetics or those following a paleo-plan; and as there’s no gluten; coeliacs can also dig straight in! There’s plenty to go around.

Start by finely slicing an onion and softening this on the hob in butter. After a couple of minutes, tumble in a good half-handful of cherry tomatoes and add a clove-&-a-half of finely chopped garlic. Cook these until the cherry tomatoes start to burst (circa 2 minutes) then add a couple of tablespoons of water to loosen the mix. Warm through, then remove the pan from the stovetop to rest.

Meanwhile, depending on your cooker and preferred method of cooking; grill, fry or oven-bake your bacon until deliciously crisp. As a guide to quantity, allow two rashers per person. Then transfer to one side to ‘take the edge’ off the heat.

Halve and de-stone your avocado and arrange this in a salad bowl. Pile up rocket leaves or other peppery green salad (watercress is absolutely delicious), forming an impressive mountain to one side.

Finish by chopping fresh basil leaves and adding these to the tomato & onion mix. Then stir through circa 100g or two heaped-tablespoons of full-fat cream-cheese. Once this is velvety smooth and amalgamated, pour lavishly over the avocado and drizzle a little virgin olive-oil over the salad leaves to add a bright glossy shine.

Then simply dig in! From start to finish, a sumptuous delight ready in 10 minutes flat. So enjoy!

Browse this and other recipes by picture on my pinterest page: country walks in ketosis pinterest.

Thanks for reading and bon ap!

Adam.

Light & Tender Slow-Cooked ‘Lamb Vermouth’ with Fast Halloumi Vegetable Gratin – ultra easy, ultra satisfying; ultra low carb!

lamb

People often mistakenly think that if you cook red meat, then it must be paired with an equally dark, robust & red sauce (picture red wine, brandy or port…). In actual fact, this couldn’t be further from the truth. Take this lamb dish for example. The sauce is built upon a base of dry vermouth (martini) and chicken stock. The comparative sweetness of the fortified wine and the richness of the stock serve to ‘brighten’ the dish and add a lightness which is uniquely refreshing.

I’m the first to hold up my hand up when it comes to doing things traditionally; but I sometimes find that when deep profound flavours (like lamb and port) get piled up on top of one another; a dish can tend to become a little heavy, and even muddy in flavour. If you can lighten something, then I’m all for it – after all, lamb is historically a late springtime dish; so lets put a little of the ‘spring’ back into its step with a gentler approach to its often more formulaic preparation!

I’ve teamed this with a quick gratin of mixed vegetables – cauliflower, green beans and beansprouts; gratinated with halloumi and cambozola. The ingredients here are infinitely variable, but I find the taste combination of the salty halloumi and ‘gamey lamb’ to be one that’s wholly sublime. As long as you chop the vegetables into pieces no thicker than a green bean, you can use any vegetable e.g. peppers, onions, mushrooms, celeriac, courgette; even kale!

One of the principal reasons for the vegetable choice here is carbohydrate content. Cauliflower has a mere 1.5g of net carbs per 100g, coupled with beansprouts at 4.2g and green beans at 3.8g. None of these will ‘break the carb bank’ and all are quick to cook, with a fresh clean flavour that somehow seems suited to this time of year. Because the lamb is slow-cooked in the oven for at least four hours, we want to accompany it with something that’s ultra fast to prepare, yet doesn’t let the side down in terms of flavour or charm.  Such a medley as this will therefore ‘hold its head high’ and do us proud in the face of its competition. Who could ask for more?!

Before we commence, just a quick word on the cooking method. Rather surprisingly, slow-cooking is actually the perfect thing for a weeknight. At the right temperature, dishes like this can be left in the oven all day, meaning that dinner is practically ready for you when you get home. If you’ve got an electric oven, then circa 120-130ºc, or 1/2 gas mark if you’re using gas. I have an Aga, so it’s the simmering-oven the whole way for me! As long as you cover the meat to allow for moisture evaporation, you’ll be absolutely fine. It can sometimes be a nerve-racking ‘leap of faith’ to put something into the oven first thing in the morning then to leave it there all day; but believe me, this couldn’t be simpler, and the results will speak for themselves! So give it a go – you won’t regret it!

Now that we’re all set, it’s time to get started! Any cut of lamb will do; I used the old-fashioned but aptly named ‘scrag end’ of lamb. This is effectively neck-steaks, cut still on the bone, which respond beautifully to slow-cooking. If you’re feeling more extravagant than me however, feel free to use leg of lamb, chops or indeed diced ‘mixed’ cuts. The results will be just as delicious, whichever you choose!

To cook the lamb, season the meat liberally then place a heavy-bottomed casserole onto the hob with a little oil. Seal the meat on a high heat until lightly golden on all sides. Remove the lamb from the pan briefly, then tumble in a roughly diced onion and add a sprinkle of dried rosemary (or any herb to your preference).

Once the onions start to soften, deglaze the pan with a whooshing glug of vermouth, enjoying the splendid sigh of steam as the alcohol evaporates into thin air right before your eyes. Then crumble a chicken stock-cube or pour on sufficient fresh stock to cover the lamb once you’ve replaced it into the pan. If you’re using cubes, put the meat back in and pour on enough water to cover the contents (waist-height if you plan to cook this more quickly). Then simply throw in a couple of unpeeled garlic cloves (unpeeled so that they can be lifted out afterwards), season well and place into a low oven as above for 4 to eight hours.

Half an hour before you’re ready to serve, take the lamb out of the oven to check on progress. The meat should be unctuously tender and fall from the bone with the merest suggestion of a wooden-spoon. Depending on how much liquid you like, if there’s more than a cm’s depth, ladle some out (you want the sauce to thicken slightly) and replace the pan lid off  back into a hot oven to reduce and for the lamb to develop a delicious thick crust on top. If it’s already there without needing to go back in uncovered, then you’ll have saved yourself a job and you can simply replace the lid and leave it to one side until you’re ready to serve up.

Meanwhile prepare your gratin. Place a knob of butter into a pan on the hob and tip in your topped-and-tailed green-beans ( a generous half-handful per person). Sauté for a minute or two, then add in finely sliced cauliflower (to same thickness as the beans). Then pour on boiling water until the vegetables  are ‘ankle-deep’ in liquid, before crumbling in a final stock-cube for good measure. Then sprinkle on chopped chilli (I used x1 red chilli including seeds), to provide a little background heat; then leave to simmer for a further minute. Once the cauliflower is starting to go al dente, sprinkle on a couple of handfuls of beansprouts and top the lot with thick wedges of halloumi and/or blue brie (cambozola). As I say, there’s no need to be precious about the type – use whatever cheese you like or have to hand. Cheddar would be equally good, as would parmesan, stilton or camembert. The world is your oyster. Once layered, transfer the dish to a hot oven for 20 minutes or until the top is golden brown and sizzling.

When all is ready, ladle your stewed lamb into bowls and spoon your bubbling gratin all around. Finish the dish with a flourish of fresh herbs (basil or oregano are ideal), then dig in whilst all is still piping hot! From start to finish you’ll find that every last mouthful is delicious! But don’t just take my word for it – give it a go and find out for yourself. Delectable in every way!

Browse this and other recipes by picture on my pinterest page: country walks in ketosis pinterest.

Thanks for reading and bon ap!

Adam.

Top 20 Low-Carb Chicken Recipes

If you’re just starting a ketogenic- or low-carb diet, food choices can sometimes seem a little daunting! Alternatively, if you’ve already been on the plan for a while; finding inspiration for ‘what to have for dinner tonight’ can also prove a challenge!

Never fear however; County Walks in Ketosis has a huge library of delicious LCHF recipes to help along the way.

Chicken is a great option for a huge range of dishes. It’s brilliant in starters, soup or salads, and translates beautifully into rich, sumptuous dinners in a myriad of forms. Its morish yet mild taste can be coupled with exotic flavours from all around the globe; from Middle-Eastern dishes, through to classic French, American, African, Indian, Italian and of course English (he says proudly!).

Its versatility is truly its crowning feature; but it also has an added bonus – it’s incredibly quick to cook and so many cuts are readily available from the local supermarket or butcher, that practically anything is possible!

To provide a little inspiration, I’ve assembled my top 20 ‘chicken’ recipes from this blog. Simply click on the title/hyperlink below to take you straight to the relevant page.

All recipes can be browsed by picture on my pinterest page: country walks in ketosis pinterest.

1. Chinese Leaf Cabbage with Ginger & Peanuts, Served with Crispy Roast Chicken

2. Sweet Chilli Chicken with Buttery Egg-Fried Cauliflower Rice & Cheese Griddled Aubergines

3. Timbale of Chicken, St Agur & Black Olives with Basil & Pumpkin Oil

4. Yoghurt & Cumin ‘Chicken Skewers’ with Roasted Aubergine & Aromatic Cauliflower Rice

5. Warm Jerk Chicken Salad with Quail’s Eggs & Yellow Peppers

6. Warm Paprika-Chicken, Bacon, Edam & Green-Bean Salad with Tangy French Vinaigrette

7. Fiery Jamaican Chicken & Pork with Rum, Coconut & Turmeric Rice

8. Black Forest Chicken with Courgette-Noodles

9. Chinese Chilli Chicken-Drumsticks with Spicy Butternut Noodles

10. Chicken, Chorizo & Chicory Gratin with Smoked Ham, Brie & Emmental

11. Slow-Roasted Chicken with Sausage, Sage & Onion Stuffing & Rich Gruyere, Parmesan Mornay

12. Jamaican Jerk Chicken with Spinach & Coconut Cauliflower-Rice

13. Creamy Italian Pesto, Smoked-Bacon & Mascapone Chicken with Fresh ‘Traffic-Light’ Salad

14. Spatchcocked Roast Chicken Satay with Buttered Greens & Cauliflower Rice

15. Warm ‘Greek-Style’ Chicken Salad with Roasted Aubergine, Courgette, Basil & Halloumi

16. Earthy & Aromatic Spanish Chicken with Chorizo, Aubergine & Buttered Savoy

17. Classic Chicken Caesar Salad

18. Chicken in a Creamy White Wine, Tarragon-Sauce with Roasted Courgette-Gratin

19. Sage-Roasted Chicken with Creamy Forestière Mushrooms, Broccoli & Sugar-Snap Peas

20. Creamy, Mild, Cauliflower, Celery & Coconut Korma (adapted for shellfish or chicken)

Enjoy browsing and thanks for reading. Bon ap!

Adam.

Classic Lamb & Aubergine Moussaka – just low carb!

WP_20150211_20_38_39_Smart

Moussaka is one of my favourite dishes! The richness of minced lamb, combined with the fresh taste of sun-ripened tomatoes and sharp tang of yoghurt is truly sublime! Best made the day before; it’s one of those great dishes you can cook and prepare ahead of time! This makes it ideal for dinner-parties, when you want the kitchen to be clean and tidy for when people arrive; or simply if you know you’ve got a busy schedule coming up and want something you can simply heat through in the oven, which still feels like a substantial meal!

And okay – I freely admit that I browned this a little too long in the oven. We’re all human and the Low Carb Kitchen is by no means immune to the cooking mishaps which plague us all! I am sure yours will look better than the above; but take my word for it – it tasted absolutely heavenly; despite the over-colouration of the yoghurt! Send me a picture of your own creation, and I can do a bit of ‘photo-substitution’; piggy-backing off your own success and expertise!

All ingredients here are incredibly low in carbohydrate. As a result, this moussaka is great for a ketogenic diet, paleo-plan, diabetic-LCHF regime or for those with an intolerance to gluten. All dietary-requirements are welcome at the Low Carb Kitchen!

Start by slicing your aubergines into thin, half-centimetre slices. Depending on the size of your dish, you want at least 3 layers of aubergine. I used a large rectangular oven-dish, enough for 6 people. This warranted 4 large aubergines; you want each layer to just cover the footprint of the dish. I always think it’s best to err on the side of caution and buy ‘one to many’, just in case!

Place the slices onto a lined baking-tray, then drizzle these with olive-oil and grind on some salt and pepper. It doesn’t matter if they overlap or are half-piled on top of each other – the end result will taste the same! Into a hot oven they go for circa half an hour, until the aubergine is soft and pliable, and just starting to brown. Remove the tray from the oven and set to one side to cool.

Whilst the aubergines are cooking, place a heavy casserole onto the hob and add a small spoonful of oil. Season your lamb-mince with sea-salt and black-pepper; then when the oil is good and hot, tumble in your lamb, enjoying the ‘sizzle’ as it hits the pan. Seal this thoroughly, stirring occasionally to prevent it sticking; then add in 2 finely sliced onions, 3 crushed cloves of garlic and any other vegetables you have needing to be used up! Mushrooms are great, as are leeks, peppers and courgettes. In terms of quantity; I used 500g of mince for 6 people. Feel free to adjust accordingly in response to size or requirement!

Sauté the vegetables for 5 minutes or so, then pour in a good glug of port or red wine for richness. Given the succulence of lamb, you’ll likely not achieve the whooshing sizzle of the traditional de-glazing process; the wine is there more for taste than any other additional benefits! Crumble in 2 stock-cubes for background ‘warmth’ and add a generous spoonful of dried herbs (rosemary or oregano are just perfect!). Then drain two cans of tinned tomatoes (pouring off the liquid) and add these to the pan. Keep the mix on the simmer for 20-25 minutes until the liquid has reduced down and all ingredients have thoroughly cooked through. Then squeeze in a good squirt of unsweetened tomato purée and incorporate lavishly with a wooden spoon. Taste to adjust the seasoning, adding more herbs, salt, stock-cubes or pepper as appropriate. When done to your satisfaction, lift the pan off the heat, ready to layer up into your serving-dish.

Whilst the mince-ragout is on the simmer, pour a cupful of double cream into a saucepan. Follow this with half a cup of water, one cup of grated cheese (cheddar, parmesan or mix of both) and a tablespoon of Dijon mustard. Season well, then place onto the hob on a low heat, stirring occasionally until the sauce is thick and smooth. The reason you add the water is to help gauge when it’s ready. Once the water has evaporated (circa 15 minutes), you’ll end up back with the consistency of double cream. If you didn’t put the water in, the reduction would have nowhere to go and the pan’s contents would burn. When ready, simply remove from the heat and commence to layer up your moussaka.

Into your oven-dish, cover the base with a layer of aubergine, then top this with a fine coating of cheese-sauce. Now ladle on your lamb-mix until the white sauce is all covered. Repeat the process, aubergine > sauce > mince until the three components are all used up. Take note however – we want the top layer to end with aubergine and sauce – no mince! So bear that in mind when portioning your ingredients.

Once the top layer of aubergine and sauce has gone on, spoon on 3-4 tablespoons of Greek yoghurt. This provides a wonderful sour tang, which counteracts the richness of the cheese and lamb to perfection. Smooth this flat then sprinkle on a dusting of grated cheese and dried herbs to complete the dish. When all is ready, cover the dish with tinfoil and leave in a cool place overnight for the dish to settle and the ingredients to develop in flavour.

The next day, 40 minutes before you’re ready to serve dinner; transfer the covered dish to a moderate to hot oven. Learn a lesson from my mistakes – keep the tinfoil on to prevent the yoghurt from browning too soon. After 20-25 minutes, remove the tinfoil and check the temperature with a probe thermometer (we want 65ºc plus…). If you don’t have one of these, you can easily trust your eyes – if the centre is bubbling and piping hot, you’ll be well on your way! Return the dish to the oven uncovered for a final ten minutes to brown up nicely on top and reach the requisite 72ºc plus!

Once nice and brown, transfer to the table, and serve up with a crisp green salad to provide textural variation. You’ll find this recipe so delicious, you’ll want to cook it time and time again! (Preferably with better results than the picture above!).

Browse this and other recipes by picture on my pinterest page: country walks in ketosis pinterest.

Thanks for reading and bon ap!

Adam.

Zingy King Prawns with Chilli, Lime & Coriander – a delicious low-carb lunch or starter; ready in minutes!

WP_20150211_20_06_05_Pro

Dishes like this are real proof that delicious food needn’t take hours to prepare. This zingy, maximum flavour recipe is ready in under 10 minutes flat! As such, it’s the perfect low-carb lunch or starter for anyone on a ketogenic diet; diabetics, gluten-intolerants and paleo-fans alike!

Roughly chop a clove of garlic and a red chill, followed by the stalks of your coriander. Place a wok onto a high heat and drizzle in a little oil. Add your pesto mix and sauté for a minute, before adding you prawns. Stir-fry these for three minutes max, until well heated through. Then add a good squeeze of lime juice to liven up the flavour.

Pile some salad leaves into your serving-bowl; watercress, rocket, or anything with a strong peppery flavour is ideal. Spoon your warm prawns evenly over the the mix and season well. Then return the wok to the pan, and quickly fry one egg per person, adding a little more oil if necessary. Lift the eggs onto the the salad then curl over a good handful of parmesan shavings, using a sturdy swiss-peeler or grater.

Finish the lot with a final flourish of chopped herbs and another squeeze of fresh lime-juice. Voila! Your delicious, healthy meal is ready! Certainly a dish of maximum taste, yet minimum effort!

Browse this and other recipes by picture on my pinterest page: country walks in ketosis pinterest.

Thanks for reading and bon ap!

Adam.

Pot-Roasted Beef Brisket with Creamy Cumin Chou D’Alsace – a sumptuous low carb feast!

WP_20150206_21_11_17_Pro

There’s something infinitely wonderful about slow-cooked food at this time of year. Over the weekend, when time is precious; food you can simply leave in the oven all day is a true delight! When you return home, a richly delicious smell is ready to greet you at the door, and dinner is all but ready! What could be easier or more convenient than that?

Some cuts of meat are more suited to slow-cooking than others. Brisket is the perfect cut of beef for such a treatment. Rather interestingly, cows do not not have collar-bones. This means that their entire front-body weight (and they’re heavy!!!) is carried by their chest muscles. Brisket is one of these ‘pectorals’, and as a consequence, it’s entirely built for strength. The muscle contains a high proportion of collagen, making it incredibly tough if cooked quickly. The fibres need to slowly break down over a long period of time. When achieved, the meat is unctuously delicious and practically dissolves under the fork with the merest pressure. Time is all it needs; therefore let the cooker do the work, so you don’t have to! You could even cook this overnight, to reheat the next day – few dishes are this flexible; so enjoy that flexibility where you can!

I’ve teamed this with Alsation cabbage. “What is that?” I hear you ask… Alsace’s history is a curious mix of sometimes German, and sometimes French occupational rule. The food is a delicious yet peculiar mix of flavours; part Anglo Saxon & part Roman. A number of Alsation dishes take advantage of this crossover, in championing the surprisingly sublime taste-combination of bacon, garlic, cream and cumin in their preparation. This mix is warm, rustic, earthy and delicious; I for one certainly can’t get enough of it! I strongly urge you to give at a go; you won’t regret it!

The only carbohydrate here is the 1.5g of cellular net carbs contained within the savoy cabbage. This low level  makes it a wonderful dish to serve to those on a ketogenic diet, but it’s equally fitting if you’re gluten-intolerant, are following a paleo-plan, or just simply want a break from ‘the bloat’. In summary then, it’s simple, fuss-free and nutritious. So give it a go!

Start with the beef. Bring this up to room-temperature and season well on all sides. Place a heavy-based casserole onto the hob and spoon in a little butter and oil to heat through. Then lower in your brisket-joint, enjoying the sizzle as the meat hits the pan.

Seal and brown the beef on all sides, then tumble in a chopped onion and a bit of leek if you have it, for good measure! Whilst these are sautéing, spear a garlic-clove with a cocktail-stick and rest this on top of the vegetables. The reason for this is that you can then simply lift it straight out afterwards. It then provides a beautiful, soft mellow infused garlic flavour to the dish, which is utterly sublime in every way! The subtle background perfume of bay also goes beautifully with beef, so add a couple of bay-leaves, then deglaze the pan with a generous glug of port or red-wine.

Add sufficient water to at least three quarters cover the beef, then crumble in a stock-cube for a little warmth of flavour.  Place the pan into a low-oven to cook for at least four hours. Whether you place a lid on the pan depends on the heat-source you’re using. Fan-ovens tend to dry-cook food, evaporating the liquid, which can result in ‘dry’ or tough meat. If you’re using one of these, I’d advise putting a lid on the pan to prevent moisture loss. If you’re cooking on gas or an aga, you’ll be fine to leave the dish uncovered to maximum 140ºc.

I left the beef in the oven for 8 hours. Upon returning home, the liquid had only reduced by an inch and the meat was sublimely tender. The top had developed a glossy crust; which locks all the juices into the meat, preventing them from evaporating upwards during cooking. When ready, remove the speared garlic, drain off all but a half-centimetre of the liquid and return the pan to the low oven with the lid off to crisp the top even further.

To make the cabbage, place a second casserole onto the hob and melt in a little butter and oil. Add some finely chopped bacon (or lardons if you have them) then finely slice an onion.  Sauté this alongside the bacon for a couple of minutes, before crushing in a generous clove of garlic or two. Now add an enthusiastic teaspoon of cumin and a small shake of paprika. The smell should be savoury and delicious; mouthwatering in every way! Then glug in a glassful of vermouth or white wine to deglaze the pan. The kitchen will witness few more enchanting aromas than this!

Whilst the liquid is bubbling away, finely slice and rinse your cabbage. Add this to the pan, retaining any water which remains on the leaves after rinsing. Sauté for a couple of minutes, then crumble in a chicken stock-cube to perk up the flavour. If you need to add a little more water, do so by all means. We want the cabbage to be waist-deep in liquid. Sprinkle in some dried herbs (sage, oregano or thyme are wonderful) then place a lid on the pan to simmer for ten minutes, allowing the cabbage to soften before you reduce the liquid.

When the 10 minutes are up, take the lid off the pan and taste to adjust the seasoning. Give the pan a good stir, then leave the lid off to allow the moisture to evaporate. At this point, take your beef out of the oven to rest until the stock has all but reduced from the vegetables.

Finally, stir a swirl of double-cream around the cabbage and remove from the heat. Transfer both the beef and the vegetables to your serving plate, then finely slice or grate some nutty emmental or other ‘mild’ cheese into thin strips.  Sprinkle these all over the savoy, then if you’re feeling indulgent (and I was), you can also tumble on some brie or other soft-rinded cheese to add richness. This is by no means essential, so I leave the choice entirely up to you!

Garnish the lot with a drizzle of the delicious pan-juices and a final flourish of chopped herbs. When you dig in with a knife, the beef will literally collapse into tender, soft chunks. The cabbage will be earthly and aromatic in flavour, providing just the right level of bite to compliment the melt-in-the-mouth consistency of the beef . Few dishes can be so perfectly balanced or more delicious than this! – it’ll be well worth the wait!

Browse this and other recipes by picture on my pinterest page: country walks in ketosis pinterest.

Thanks for reading and bon ap!

Adam.

Currywurst with Courgette Gratin ‘Chaource’ – a fast, delicious low carb treat!

WP_20150203_21_23_25_Pro

Variety is the spice of life; and in the cold winter months, we all need a little bit of spice to pep things up! We also need food that’s fast and filling, which keeps the home fires burning and holds the cold at bay. Well this dish fits the bill on all fronts. It’s ready in under 30 minutes, yet tastes like you’ve toiled for hours! This makes it the perfect week-night dinner for when you’re back late from work but still want to enjoy a good home-cooked meal that’s all about food not just fuel

The ingredients I use here may sound exotic, but they can be substituted for anything you have to hand. I used German Bratwurst (very quick to cook & absolutely delicious), plus French Chaource cheese. But any robust pork sausage and firm white-rinded cows’ or goats’ cheese will do the job. Try this with brie or camembert; bangers or hotdogs. The principals are the same for whatever you choose – so enjoy the freedom and go with what’s simple. The best food is never overly complicated!

The only real carbohydrate here comes from the courgettes. But at 1.3g of net carbs per 100g, you’ll have no worries about going overboard on the starch! This makes the dish perfect for diabetics or those on a low-carb regime, such as the ketogenic diet or paleo-plan. Dependent on your sausages there’s no gluten either, so those with an intolerance or coeliacs will be well catered for.

Start by slicing an onion and sautéing this a little butter and oil. Add in chopped celery then a good teaspoonful of pre-prepared red-curry paste or dried curry powder. If you like things hotter, add some chilli powder or a finely chopped red chilli. Then simply pour in a can of chopped tomatoes, crumble in a chicken stock-cube, crush in a clove of garlic & stir the lot round, making sure to season it well. Finally sprinkle on a little sweetener to ‘brighten’ the chilli; lay your bratwurst on top, then into a hot oven it goes for 20 minutes until the sausages are golden brown and cooked to perfection!

Meanwhile, slice your courgette into thin yet handsome chunks, and sauté in a good spoonful of butter. Crush in another clove or garlic and sprinkle on some dried herbs (oregano, basil, sage or thyme are ideal). Once the vegetables have started to soften (circa 2 minutes), slice your cheese and lay this in thick wedges over the surface. Then simply transfer the pan to the top of the oven for 15 minutes to allow the cheese to melt and turn golden brown and bubbly.

Voila! Your low-carb feast is prepared! Serve it with a generous spoonful of good quality mild mustard and dig in whilst the lot is still piping hot! Minimum effort; maximum reward. What could be better!

Browse this and other recipes by picture on my pinterest page: country walks in ketosis pinterest.

Thanks for reading and bon ap!

Adam.